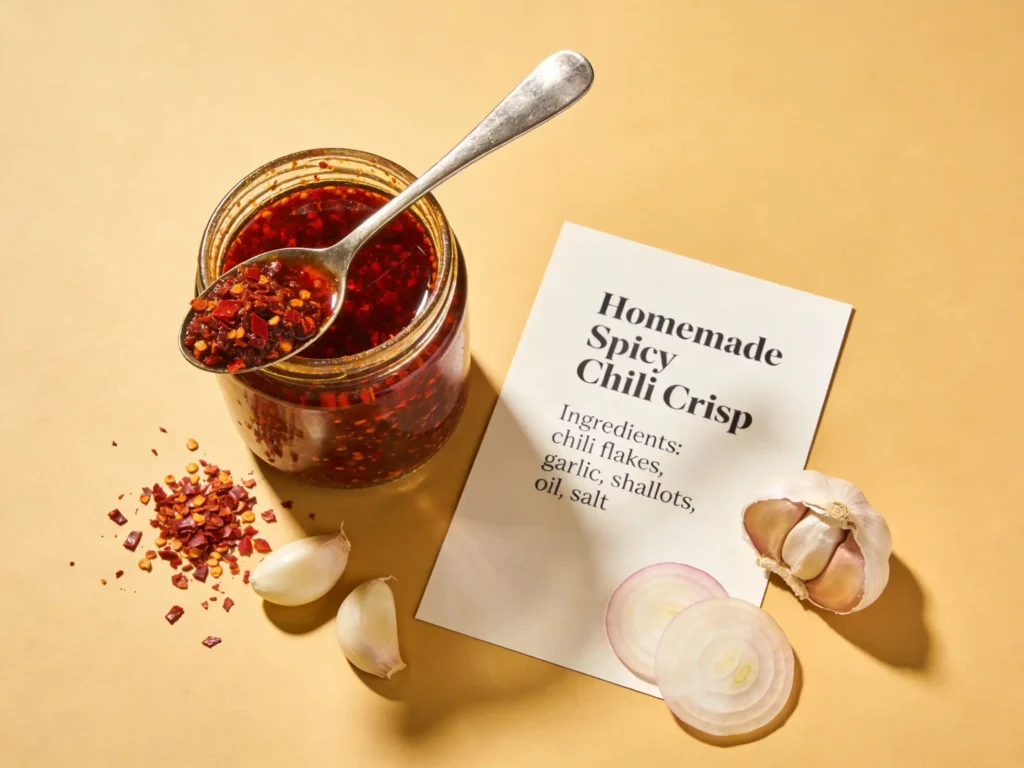
Homemade Spicy Chili Crisp turns a few pantry staples into one of the most exciting condiments you can keep in your kitchen. It brings heat, crunch, savory depth, and a glossy oil that wakes up noodles, eggs, soups, rice bowls, dumplings, and even roasted vegetables.
A good Homemade Spicy Chili Crisp tastes bigger and fresher than most store-bought jars. You control the heat, the crunch, the garlic level, and the umami, so the final jar fits your taste instead of forcing you to settle for someone else’s formula.
I love recipes like this because one batch keeps working long after the cooking ends. A spoonful can change a simple dinner in seconds, and that kind of jar belongs in every refrigerator.
Hi, I’m Chef Adriana, and I love condiments that do real work at the table. Homemade Spicy Chili Crisp is one of those recipes that feels bold, practical, and exciting all at once.
The first time I made my own batch, I realized how much brighter the aromatics tasted when I fried them fresh instead of relying on a shelf-stable jar. The garlic stayed more fragrant, the shallots tasted sweeter, and the oil carried the chili flavor in a way that felt much more alive.
Drizzle this incredibly versatile, savory condiment over a warm bowl of our mongolian ground beef noodles. The crisp heat and glossy oil fit those rich noodles perfectly.
Table of Contents
Table of Contents
Why Homemade Spicy Chili Crisp Beats Store-Bought
Customizing the Umami and Heat Levels
One of the biggest strengths of Homemade Spicy Chili Crisp is control. You decide whether the jar leans smoky, sharp, nutty, numbing, garlicky, or deeply savory.
Store-bought versions can be great, but they lock you into one balance. Homemade Spicy Chili Crisp lets you fine-tune the chili level, salt level, aromatics, and crunch until it tastes exactly right for your kitchen.
That matters because not everyone wants the same kind of heat. Some people want a slow burn, while others want more of a warm background note that supports the garlic and shallots.
The same goes for umami. You can use a pinch of mushroom powder, a little soy sauce powder, or a touch of sesame for depth without making the condiment feel muddy or heavy.
I especially like using shiitake mushroom powder when I want a rich savory base without relying on MSG. It gives Homemade Spicy Chili Crisp a fuller backbone and pairs beautifully with both noodles and soups.
This kind of control is what makes the recipe worth making from scratch. You are not just copying a jar from the store. You are building a condiment that fits the way you like to eat.
The Magic of Freshly Fried Aromatics
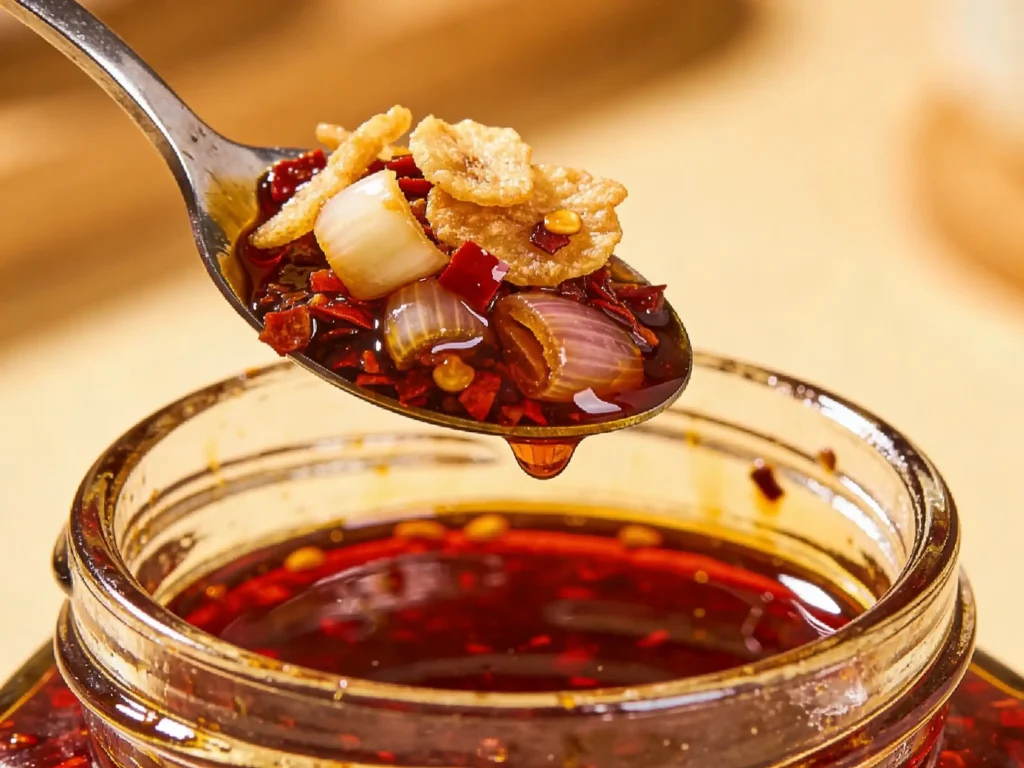
Freshly fried garlic and shallots are the soul of Homemade Spicy Chili Crisp. They bring the golden crunch that makes every spoonful feel textured and layered instead of just oily and spicy.
That crunch only happens when you control the frying carefully. If the aromatics cook too fast, they go bitter, and if they stay too pale, they turn soft after cooling.
Fresh frying also affects the aroma. Garlic that has just turned golden in oil smells sweeter, deeper, and much more inviting than a jar that has been sitting on a shelf for months.
The same goes for shallots. They become crisp, toasty, and lightly sweet, which helps round out the sharper edges of the chilies.
This is one reason Homemade Spicy Chili Crisp feels so satisfying to make. You can smell the change as the oil works through the aromatics and the whole mixture starts to smell rich and savory.
That fresh aroma is hard to beat. Once you smell a batch at the right moment, you understand why the homemade version has such a loyal following.
Why Trust This Recipe
Chef Adriana focuses on practical, flavor-packed condiments that taste bold, store well, and improve everyday meals with very little effort.
Essential Ingredients for the Perfect Crunch
Choosing the Right Oil and Chilies
Print
How to Make Homemade Spicy Chili Crisp
- Total Time: 40 minutes
- Yield: About 2 cups 1x
Description
A bold Homemade Spicy Chili Crisp with crunchy garlic, crisp shallots, deep red chili oil, and savory umami for noodles, eggs, soups, and dips.
Ingredients
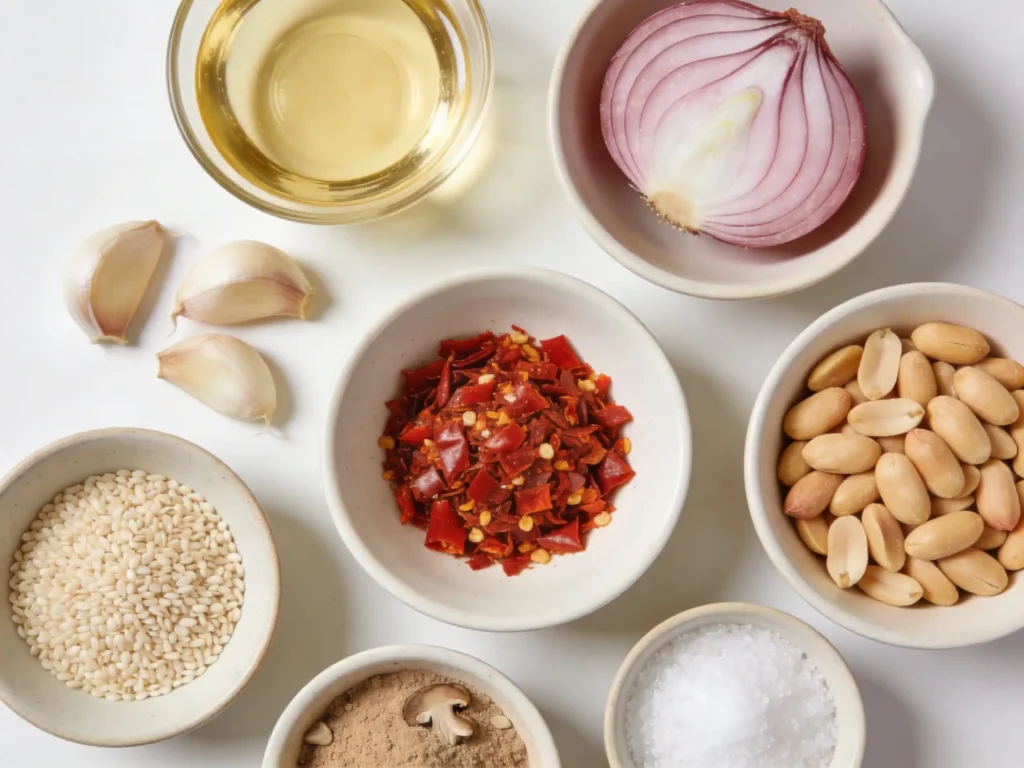
- 1 1/2 cups neutral oil, such as peanut or canola
- 6 garlic cloves, thinly sliced
- 3 medium shallots, thinly sliced
- 1/3 cup gochugaru or mixed chili flakes
- 1 to 2 tablespoons crushed red pepper flakes, to taste
- 1 tablespoon sesame seeds
- 1/4 cup chopped peanuts
- 1 teaspoon salt
- 1 teaspoon sugar
- 1 teaspoon shiitake mushroom powder
- 1/2 teaspoon Sichuan peppercorns, optional
Instructions
- Thinly slice the garlic and shallots evenly.
- Place the garlic, shallots, and oil in a heavy saucepan while the oil is still cold.
- Set the pan over medium heat and fry slowly, stirring often.
- Remove the garlic when pale golden, about 6 to 8 minutes depending on slice thickness.
- Continue frying the shallots until golden and crisp, about 8 to 12 minutes total.
- Strain the aromatics from the oil and let them cool separately on paper towels.
- In a heatproof bowl, combine gochugaru, red pepper flakes, sesame seeds, peanuts, salt, sugar, mushroom powder, and optional Sichuan peppercorns.
- Reheat the strained oil to 325°F to 350°F.
- Slowly pour the hot oil over the chili mixture and stir carefully.
- Let the mixture cool slightly, then fold in the fried garlic and shallots.
- Transfer to a clean jar and cool completely.
- Store in the refrigerator and always use a clean dry spoon.
Notes
A cold oil start helps the garlic and shallots cook more evenly.
Do not let the garlic turn dark brown or it may taste bitter.
For the best crunch, cool the fried aromatics separately before mixing them back in.
Keep the oil temperature between 325°F and 350°F when blooming the chilies.
Store Homemade Spicy Chili Crisp in the refrigerator for safer long-term use.
- Prep Time: 20 minutes
- Cook Time: 20 minutes
- Category: Condiment
- Method: Stovetop
- Cuisine: Asian-Inspired
Nutrition
- Serving Size: Per 1 tablespoon
- Calories: 80 kcal
- Sugar: 0g
- Sodium: 90mg
- Fat: 8g
- Saturated Fat: 1g
- Unsaturated Fat: 6g
- Trans Fat: 0g
- Carbohydrates: 2g
- Fiber: 0g
- Protein: 0g
- Cholesterol: 0mg
The oil in Homemade Spicy Chili Crisp must stay neutral enough to carry the aromatics and spices without fighting them. Peanut oil, canola oil, avocado oil, or another mild high-heat oil works best.
Olive oil is not a good fit here. It smokes more easily, brings a stronger flavor, and can leave the crisp with a bitter finish when the heat climbs too high.
The chilies also shape the entire personality of the jar. Gochugaru gives bright red color and mild warmth, Sichuan-style flakes bring deeper heat, and standard crushed red pepper creates a sharper, more familiar burn.
Some versions also include Sichuan peppercorns for a lightly tingling finish. That tingling quality does not replace heat, but it changes the way the spice feels on the tongue.
I like blending chili styles when I want a more rounded Homemade Spicy Chili Crisp. One chili gives color, another gives clean heat, and a third can add a more interesting finish.
That layered approach makes the condiment feel more complete. It also helps the jar work with more foods instead of tasting flat or harsh.
Here is a simple chili guide:
| Chili Type | Main Character | Best Role in Homemade Spicy Chili Crisp |
|---|---|---|
| Sichuan Peppercorns | Tingling, citrusy | Adds numbing lift and complexity |
| Gochugaru | Bright color, gentle heat | Builds beautiful red color and balanced warmth |
| Red Pepper Flakes | Sharp direct heat | Adds punch and familiar spice |
If you enjoy bold spicy condiments with a different sweet-smoky profile, you should also try our cherry-chipotle firecracker jam. It lands in a different category, but it gives the same kind of flavor excitement.
To build stronger depth from the start, I also like ideas from our cooking with pink salt. Small seasoning choices can make the savory base feel fuller and better balanced.
The Crispy Bits: Shallots, Garlic, and Peanuts
The “crisp” in Homemade Spicy Chili Crisp comes from texture, not just spice. Fried shallots and garlic create the signature crunch, while peanuts add another layer of nuttiness and bite.
Shallots fry into sweet, golden pieces that feel delicate and light. Garlic gives a firmer crisp and a stronger flavor, so the two together create better balance than either one alone.
Peanuts are optional, but I like them when I want the condiment to feel more substantial. They make each spoonful taste more layered and more snackable.
You can also add sesame seeds for a smaller, toastier crunch. Just keep the mixture balanced so one ingredient does not crowd out the others.
The goal is not random texture. A good Homemade Spicy Chili Crisp should taste like each crisp bit belongs in the jar and supports the oil around it.
That is why cutting size matters too. Thin, even slices fry more predictably and cool into a much better crunch.
The Step-by-Step Frying and Infusion Process
The “Cold Oil Start” for Frying Garlic and Shallots
A cold oil start is one of the best ways to fry aromatics evenly for Homemade Spicy Chili Crisp. Instead of dropping garlic and shallots into already-hot oil, you place them in cool oil and let everything warm together.
That slower rise in temperature helps pull moisture out gradually. It also lowers the risk of burning the edges before the centers have a chance to dry and crisp.
This matters most with garlic, which can go from pale to bitter very quickly. The slower method gives you more control and makes it easier to stop at the right shade of gold.
Shallots also benefit from the gentler climb in heat. They shrink as they fry, so starting them in cold oil helps them crisp more evenly.
I like to use a heavy saucepan and steady medium heat for this stage. Homemade Spicy Chili Crisp rewards patience, and the aromatics are where that patience pays off most clearly.
Pouring the Hot Oil Over the Spices Safely
Once the aromatics are fried and removed, the hot oil still has work to do. It gets poured over the bowl of chili flakes and seasonings, which blooms the spices and creates that deep red, fragrant base.
This step deserves respect because the oil is hot and the spices will sizzle right away. A heatproof bowl, a stable surface, and a slow controlled pour matter here.
The best Homemade Spicy Chili Crisp smells incredible at this point. The hot oil wakes up the chilies, releases the aromatics in the spice mix, and creates the glossy base that will coat every crisp bit later.
Chef’s Note: Always strain the fried garlic and shallots out of the oil and let them cool separately. That step helps them stay glassy and crisp instead of softening in residual heat.
Here is the full process:
- Thinly slice the shallots and garlic as evenly as possible.
- Place them in a saucepan with neutral oil while the oil is still cold.
- Turn the heat to medium and begin frying slowly.
- Stir often so the pieces color evenly.
- Remove the garlic when it turns pale golden.
- Remove the shallots when they turn deeper golden and crisp.
- Let both cool on a paper towel-lined plate.
- In a heatproof bowl, combine chili flakes, sesame seeds, salt, sugar, mushroom powder, and optional Sichuan peppercorns.
- Heat the strained oil to about 325°F to 350°F.
- Slowly pour the hot oil over the spice mixture.
- Stir carefully as the mixture sizzles and blooms.
- Let the oil cool slightly, then fold in the crisp garlic, shallots, and peanuts.
- Transfer the Homemade Spicy Chili Crisp to clean jars and cool fully before storing.
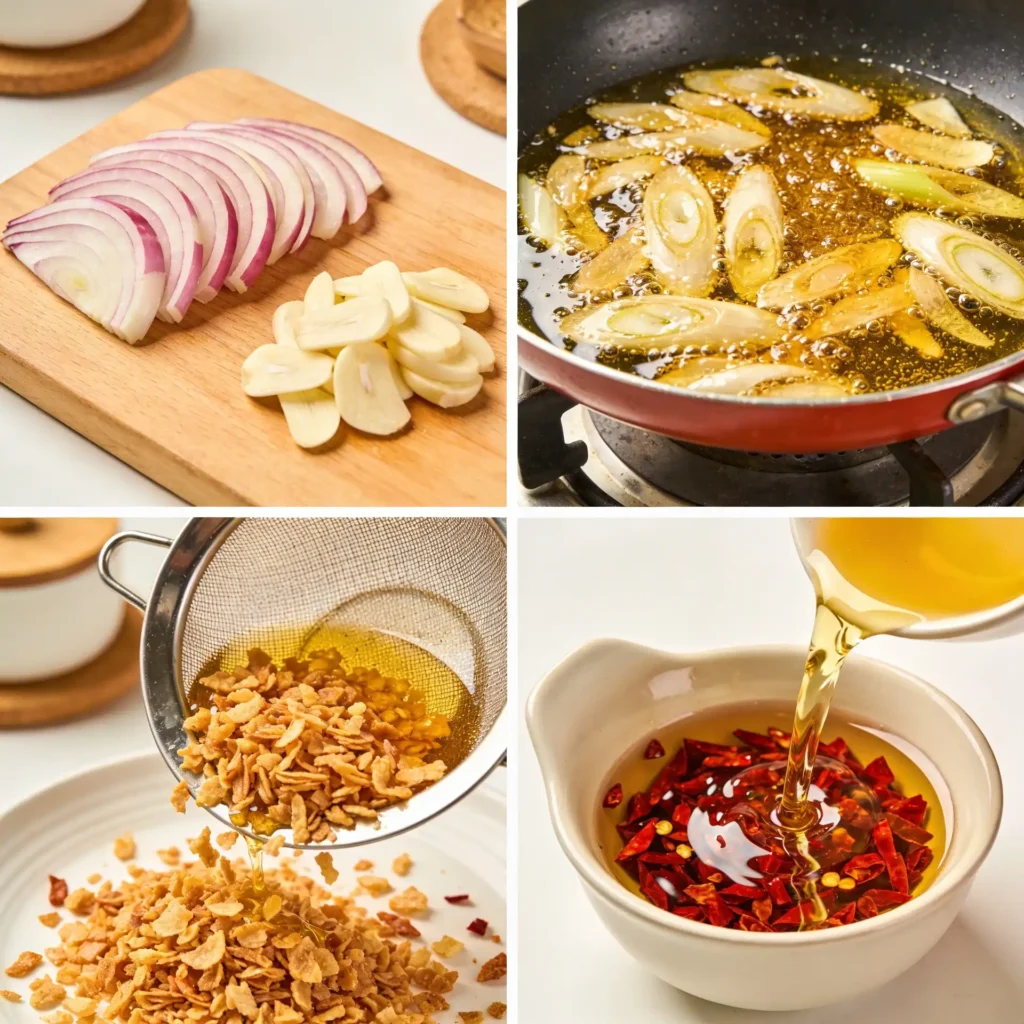
This method gives you better control over flavor and crunch than tossing everything together at once. It also helps each piece keep its own identity in the final jar.
Stir a spoonful of this chili crisp into our easy wonton soup for an instant flavor jump. It also adds a great kick to our creamy butternut squash and sausage tortellini soup.
Food Safety: Preventing Botulism in Homemade Oils
The Danger of Raw Garlic in Stored Oil
One of the biggest concerns with infused oils is raw garlic stored in oil. Raw garlic contains moisture, and that moisture can create unsafe conditions when trapped in oil for too long.
That is why Homemade Spicy Chili Crisp should never treat raw garlic as a shortcut. The jar needs fully cooked, dehydrated aromatics, not wet garlic floating in oil.
This is an important difference. Chili crisp is not the same as raw garlic oil because the frying process changes the moisture level and the texture of the ingredients.
Safety matters just as much as flavor. A condiment that tastes great still needs to be handled and stored with care.
Why Frying Dehydrates the Ingredients Safely
Frying helps make Homemade Spicy Chili Crisp safer because it cooks off water from the garlic and shallots. Once those aromatics turn crisp, they no longer behave like raw wet ingredients sitting in oil.
That drying effect is one reason texture and safety connect here. Crisp bits are not only more delicious, they are part of what makes the jar more stable when refrigerated and handled properly.
You still need clean jars and careful storage. Homemade Spicy Chili Crisp should be cooled fully, sealed well, and stored in the refrigerator for the safest long-term use.
Always use a clean spoon when serving it. That habit protects the jar from extra moisture and stray food bits that can shorten its life.
Practice more safe preservation and storage habits with our quick pickled red onions. For a sweeter Asian-inspired sauce option, check out our huli huli sauce recipe.
Best Ways to Serve Your Chili Crisp
Drizzling Over Eggs, Noodles, and Soups
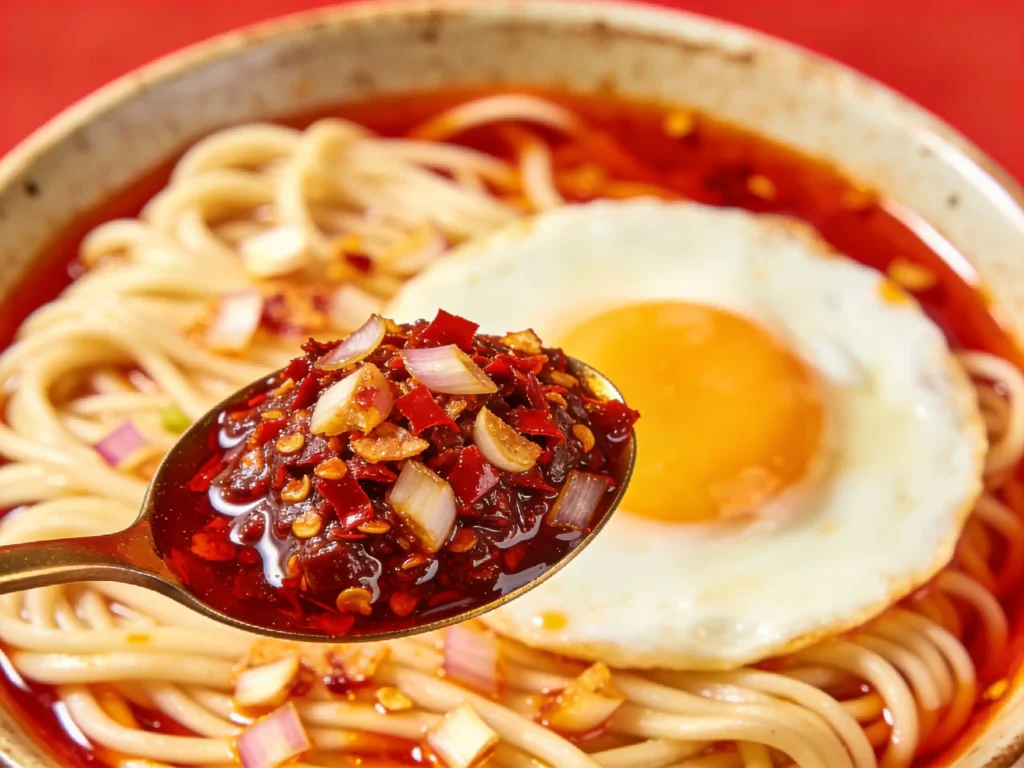
Homemade Spicy Chili Crisp earns its place because it fits so many foods. Spoon it over fried eggs, soft scrambled eggs, noodles, congee, rice bowls, or dumplings and the whole plate wakes up.
I especially love it on simple foods that need a little edge. Plain rice, steamed eggs, or broth-based soup become much more interesting once the crisp oil and crunchy bits hit the bowl.
That is part of the beauty of this condiment. It does not need a complicated dish to shine.
The red oil adds shine, the aromatics add crunch, and the spice gives the bite a longer finish. Few condiments do all three at once.
Mixing into Dips and Meat Marinades
Homemade Spicy Chili Crisp also works beyond drizzling. Stir it into mayo, sour cream, yogurt-based dips, or softened butter for fast sauces and spreads.
It works in marinades too. A spoonful mixed with soy sauce, garlic, and a little acid can add fast depth to chicken, pork, or beef.
Because the oil carries flavor so well, a little goes a long way. You do not need half a jar to make a difference.
Mix this chili crisp into a dipping sauce for our easy beef empanadas recipe. Brush a little over our warm garlic parmesan cheeseburger bombs right as they come out of the oven.
Troubleshooting Bitter Oil or Soft Bits
How to Rescue Slightly Dark Garlic
Bitter notes in Homemade Spicy Chili Crisp usually come from heat that climbed too fast. Garlic browns quickly, and once it moves past golden into dark brown, the flavor can become harsh.
If the garlic is only a little too dark, you may still be able to save the batch by increasing the fresh crisp bits and blending the finished jar with more neutral oil. That will not erase the bitterness completely, but it can soften it.
If the garlic tastes deeply burnt, it is better to start over. A bitter base can dominate the whole jar and make every use less enjoyable.
This is one reason I like frying garlic and shallots separately if the slices are very different in thickness. It gives you more control and lowers the risk of one ingredient overcooking before the other is ready.
Fixing a Lack of Crunch
Soft shallots and soft garlic usually point to moisture or under-frying. If the slices were too thick, crowded in the pan, or not cooked long enough, they may cool into chewy pieces instead of crisp ones.
Residual heat can also soften them if they sit in the hot oil too long after frying. That is why straining and cooling them separately matters so much in Homemade Spicy Chili Crisp.
Here is a quick troubleshooting guide:
| Problem | Likely Cause | Solution |
|---|---|---|
| Bitter taste | Oil was too hot or garlic fried too dark | Lower the oil temperature and stop at pale golden |
| Soft shallots | Moisture remained or shallots under-fried | Slice thinly, fry longer, and cool separately |
| Weak spice bloom | Oil not hot enough when poured | Pour oil between 325°F and 350°F |
| Greasy flat flavor | Not enough salt, aromatics, or umami | Adjust seasoning and add more crisp bits |
Homemade Spicy Chili Crisp gets easier every time you make it. Once you learn your pan, your oil, and your preferred chili balance, the process feels much more predictable.
Frequently Asked Questions
What are the ingredients in spicy chili crisp?
Most Homemade Spicy Chili Crisp recipes include neutral oil, chili flakes, garlic, shallots, salt, and often peanuts, sesame seeds, and a savory seasoning like mushroom powder or soy-based flavoring.
What makes the crisp in chili crisp?
The crunch comes from properly fried aromatics like garlic and shallots, plus optional peanuts or seeds. In Homemade Spicy Chili Crisp, the “crisp” should stay crunchy even after mixing with the oil.
How do I prevent botulism in homemade chili oil?
Do not store raw garlic in oil. For Homemade Spicy Chili Crisp, fry the garlic and shallots fully to remove moisture, use clean jars, and store the finished jar in the refrigerator.
Can I make a non-spicy chili crisp?
Yes. You can lower the heat by using milder chili flakes or reducing the spicy peppers while keeping the garlic, shallots, and sesame for texture. The result will still feel like Homemade Spicy Chili Crisp, just gentler.
What is the best oil to use for chili crisp?
Use a neutral high-heat oil like peanut, canola, or avocado oil. These oils let the aromatics and chilies lead without adding bitterness.
How long does homemade chili crisp last?
Homemade Spicy Chili Crisp lasts best when refrigerated in a clean sealed jar and served with a dry clean spoon. For the safest use, keep it cold and enjoy it within a practical refrigerator window.
Conclusion
Homemade Spicy Chili Crisp gives you much more than heat. It gives you crunch, savory depth, glossy red oil, and a jar that can wake up simple food in seconds.
The best version comes from small details done well. Use neutral oil, fry the aromatics carefully, bloom the spices at the right temperature, and store the finished jar with clean cold handling.
Once you make Homemade Spicy Chili Crisp from scratch, it becomes one of those condiments you keep reaching for. For another sweet and fiery flavor profile, do not miss our orange-chipotle citrus fire jam.
Want more recipes like this? Chef Adriana on Facebook and never miss a tasty idea!