Introduction
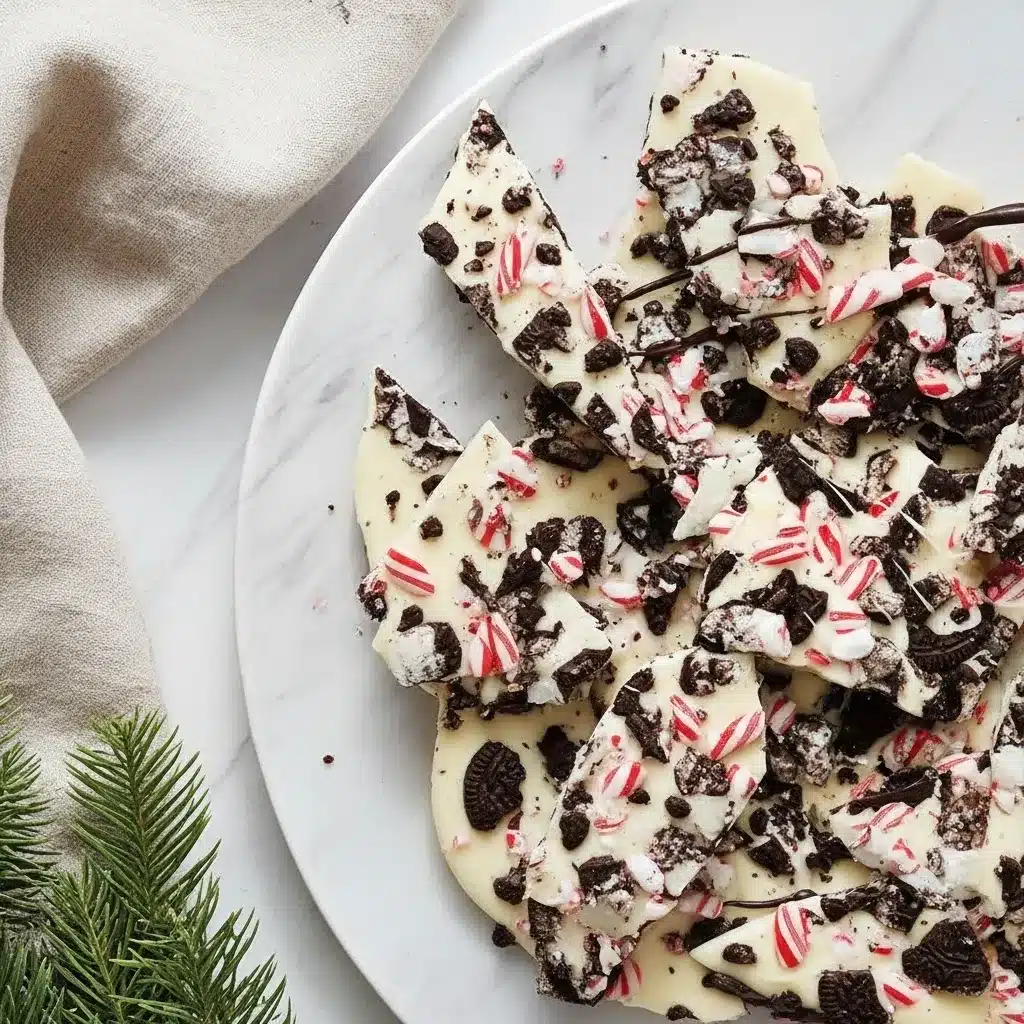
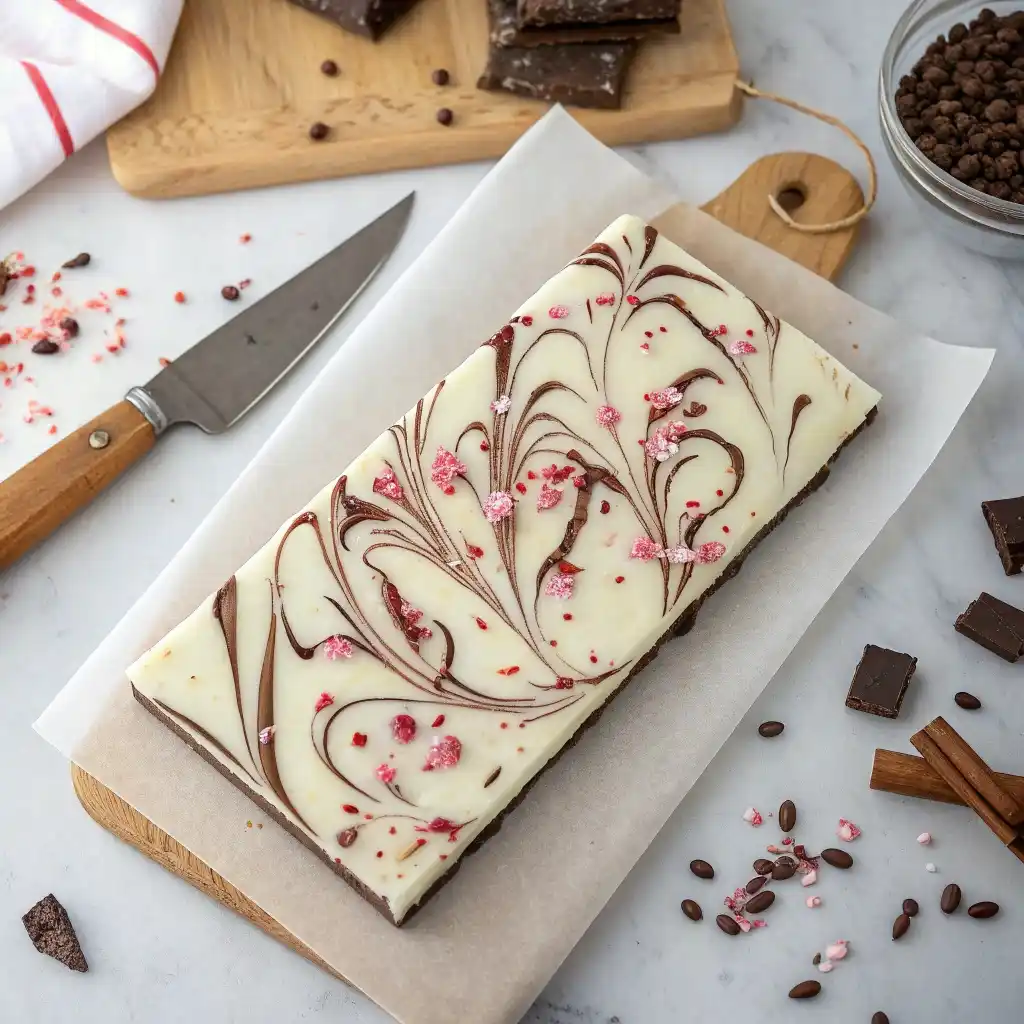
Peppermint Oreo White Chocolate Bark delivers bakery-glossy snap, cool peppermint aroma, and a cookies-and-cream crunch that feels festive the moment it breaks. Peppermint Oreo White Chocolate Bark also solves the two problems most home bark recipes face: dull, streaky chocolate and toppings that fall off. With melting wafers and a simple seed method, you get a no-bloom, mirror-like finish that stays crisp on the counter and ships well in tins. The Oreo Thins base keeps the bark structured without turning thick or chewy, and a gentle two-pass swirl gives clean marbling instead of muddy streaks.
Make Peppermint Oreo White Chocolate Bark for cookie trays, teacher gifts, or the last-minute dessert you can pull off between errands. For a cozy pairing, pour small mugs of Peppermint Hot Chocolate with Cocoa Powder and plate a few shards for the easiest holiday nightcap.
Table of Contents
Why this Peppermint Oreo White Chocolate Bark works
Peppermint Oreo White Chocolate Bark stays glossy because melting wafers contain stabilized cocoa butter that behaves well at gentle heat. Stirring in a few unmelted wafers as “seeds” keeps the melted chocolate in the right crystal form, so you avoid gray bloom and streaks. The result is a clean snap and a pretty sheen without fussy tempering gear.
Oreo Thins create a tiled base that supports the sheet without turning it thick or hard to bite. Dipping the cookie bottoms first anchors the foundation, then a thin white layer on top keeps the bark balanced. You taste cool mint, creamy vanilla, and deep cocoa in every bite of Peppermint Oreo White Chocolate Bark rather than a wall of sweetness.
Swirling is controlled to protect marbling. Spoon small pools of dark chocolate onto the white, then drag a skewer in two or three passes. Stopping early prevents muddy color and keeps the pattern distinct. Sprinkle peppermint bits while the surface is still glossy, and press lightly with fingertips so they bond and don’t shed in the tin.
A tiny pinch of fine salt sharpens both chocolate and mint, which helps the candy taste cleaner and less cloying. If you want a quick refresher on how a touch of salt brightens sweets, skim the tips in Cooking with Pink Salt. With those small choices, Peppermint Oreo White Chocolate Bark cuts into sleek shards, packs neatly, and holds texture for days.
Print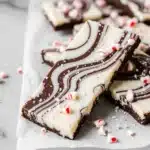
Peppermint Oreo White Chocolate Bark
- Total Time: 15 minutes
- Yield: 30 pieces 1x
Description
Peppermint Oreo White Chocolate Bark delivers a glossy snap, cool mint aroma, and cookies-and-cream crunch. A simple seed step with melting wafers keeps the finish shiny and no-bloom, while Oreo Thins create a tiled base that cuts into sleek, giftable shards in minutes.
Ingredients
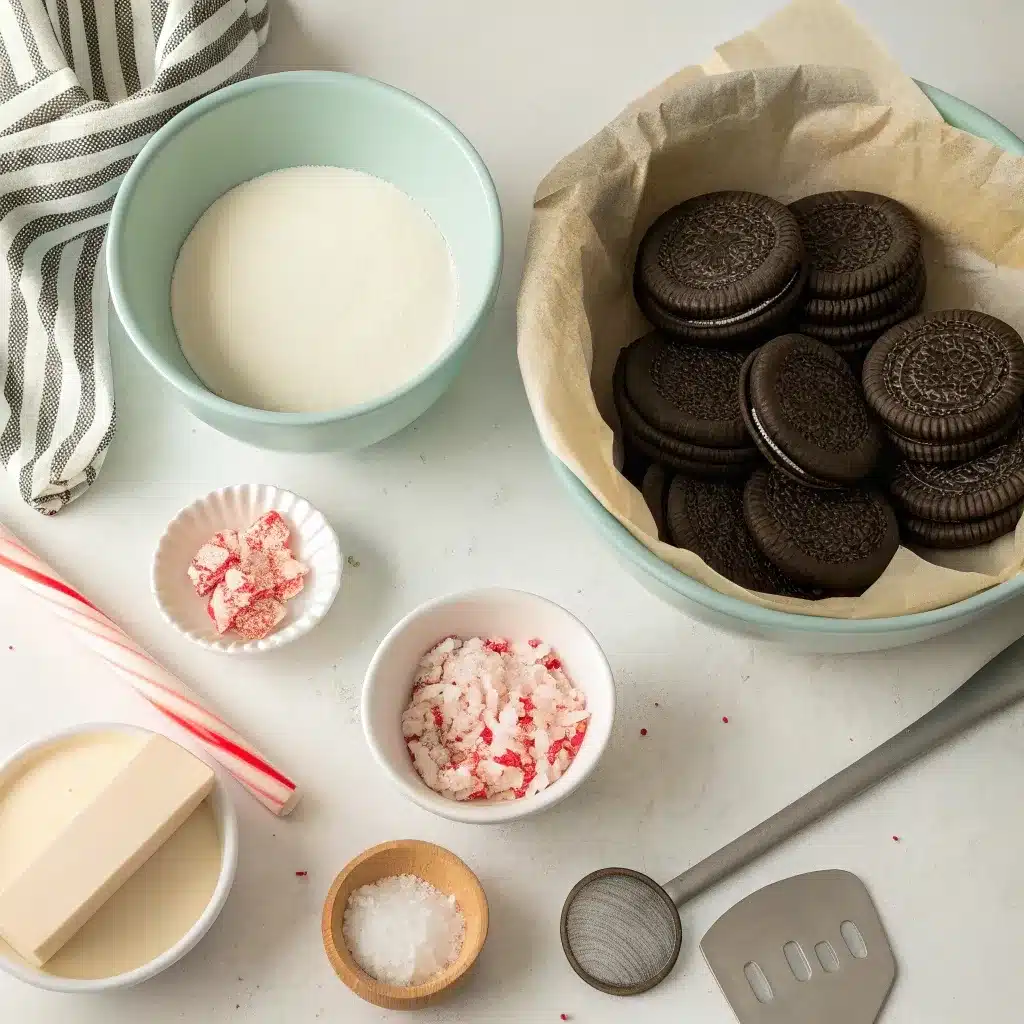
- 1 (10 oz) package Oreo Thins (35–40 cookies)
- 2 (10 oz each) bags white chocolate melting wafers
- 1 (10 oz) bag chocolate melting wafers (semi-sweet or dark)
- ¼ cup peppermint bits (crushed candy canes or baking bits)
- Pinch fine salt (optional)
Instructions
- Line an 11×15 rimmed sheet pan with foil or parchment; press flat into corners.
- In a microwave-safe bowl, melt 2½ cups white melting wafers at 50% power, stirring every 30 seconds until smooth. If warm, stir in a few unmelted wafers to seed. Stir in a tiny pinch of fine salt if using.
- In a second bowl, melt 1 cup chocolate melting wafers the same way; stir until smooth and fluid.
- Dip the bottoms of Oreo Thins into the melted white chocolate and lay them snug and side by side on the lined pan to form a tiled base.
- Pour the remaining white chocolate over the cookies and spread to a thin, even layer (about 3–4 mm) with an offset spatula.
- Spoon small pools of melted chocolate across the surface and swirl gently with a skewer or knife tip in 2–3 slow passes for clean marbling.
- Sprinkle peppermint bits over the glossy surface and press very lightly so they adhere. Let set at cool room temperature until firm (or chill 5–8 minutes, then finish setting on the counter).
- For sleek shards, warm a chef’s knife, dry it well, score lines, and press down in long strokes. For a rustic look, break by hand once fully set. Store sealed at room temperature.
Notes
- Use melting wafers and a quick seed step for a glossy, no-bloom finish. Keep both chocolates warm but never hot; if streaks appear, stir in a few unmelted wafers.
- Add peppermint bits while the surface is glossy so the topping bonds. Aim for a thin layer to keep the bite crisp.
- For stronger contrast, choose dark wafers; for a sweeter finish, choose milk.
- Gluten-free variation: use gluten-free sandwich cookies and confirm wafers are GF.
- Shelf life is up to two weeks in a cool, dry room, layered with parchment in an airtight tin.
- Prep Time: 10 minutes
- Cook Time: 5 minutes
- Category: Candy, Dessert
- Method: No-Bake
- Cuisine: American
Nutrition
- Serving Size: 1 piece
- Calories: 206 kcal
- Sugar: 21 g
- Sodium: 69 mg
- Fat: 11 g
- Carbohydrates: 25 g
- Fiber: 1 g
- Protein: 2 g
- Cholesterol: 6 mg
Ingredients & Substitutions
Peppermint Oreo White Chocolate Bark works best with simple, reliable ingredients and a few smart backup options. Here’s exactly what to buy and how to swap without losing gloss, snap, or clean marbling.
Core
- 1 (10 oz) package Oreo Thins (35–40 cookies)
- 2 (10 oz each) bags white chocolate melting wafers
- 1 (10 oz) bag chocolate melting wafers (semi-sweet or dark)
- ¼ cup peppermint bits (crushed candy canes or baking bits)
- Pinch fine salt (optional, enhances flavor)
Why these: Oreo Thins keep the sheet crisp and easy to bite. Melting wafers set glossy and resist bloom, so the bark snaps cleanly and cuts into neat shards. Peppermint bits add mint aroma and color; the light salt sharpens flavor so the candy tastes balanced, not overly sweet.
Smart Swaps
- Oreo Thins → regular Oreos (halve them) or chocolate wafers for a thinner, more delicate bark.
- Peppermint bits → crushed candy canes or peppermint sprinkles; add while the surface is still glossy so they adhere.
- White wafers → high-quality white couverture; melt gently and use a small seed of unmelted buttons to avoid bloom.
- Semi-sweet → dark for stronger contrast; milk chocolate for a softer, sweeter finish.
- Allergy-aware: use gluten-free chocolate sandwich cookies if needed, and confirm your wafers are gluten-free.
When swapping chocolates, keep layers thin and work at gentle heat. If anything gets too warm, stir in a few unmelted wafers to “seed” and bring the temperature back into a stable range for a shiny, no-streak finish.
Flavor Add-Ins (Optional)
- Tiny vanilla or peppermint extract in the white chocolate (go very light; oil-based flavor is best so the chocolate doesn’t seize).
- Cocoa nibs for a subtle, sophisticated crunch without extra sweetness.
- Mini marshmallows for a playful “peppermint s’mores” vibe (expect a slightly thicker sheet).
Keep add-ins modest so the marbling stays visible, the snap stays crisp, and the overall look of Peppermint Oreo White Chocolate Bark remains clean and gift-ready.
Tools & Setup
A little prep makes Peppermint Oreo White Chocolate Bark fast, tidy, and glossy. Set up your station before melting anything so you can work while the chocolate is fluid and the surface stays smooth. Aim for a cool, dry room; humidity and heat encourage bloom and dull finishes.
What you need
- 11×15 rimmed sheet pan
- Foil or parchment (line the pan edge to edge)
- Two microwave-safe bowls (one for white wafers, one for chocolate wafers)
- Silicone spatula (folding and scraping)
- Offset spatula (spreading thin, even layers)
- Skewer or butter-knife tip (clean marbling)
- Chef’s knife (scoring and pressing for sleek shards)
- Optional instant-read thermometer (helps keep melts in the 90–93°F comfort zone)
- Optional small zip bag (for a quick drizzle detail)
How to set up for success
- Clear a wide, cool workspace so Peppermint Oreo White Chocolate Bark can set undisturbed.
- Line the pan completely and crease the foil or parchment into the corners for sharp edges.
- Pre-measure wafers, peppermint bits, and cookies; keep everything within arm’s reach.
- Plan your sequence: dip cookies, spread white chocolate, dot with chocolate, swirl 2–3 passes, sprinkle peppermint.
- Microwave at 50% power, stirring every 30 seconds; if a bowl feels hot, seed with a few unmelted wafers to bring it back into a glossy, stable range.
- Keep tools dry; a drop of water can make melts seize.
- If your kitchen runs warm, set the lined pan on a cool stone surface so Peppermint Oreo White Chocolate Bark firms quickly without a long fridge chill.
Step-by-Step: How to Make Peppermint Oreo White Chocolate Bark
Line & arrange
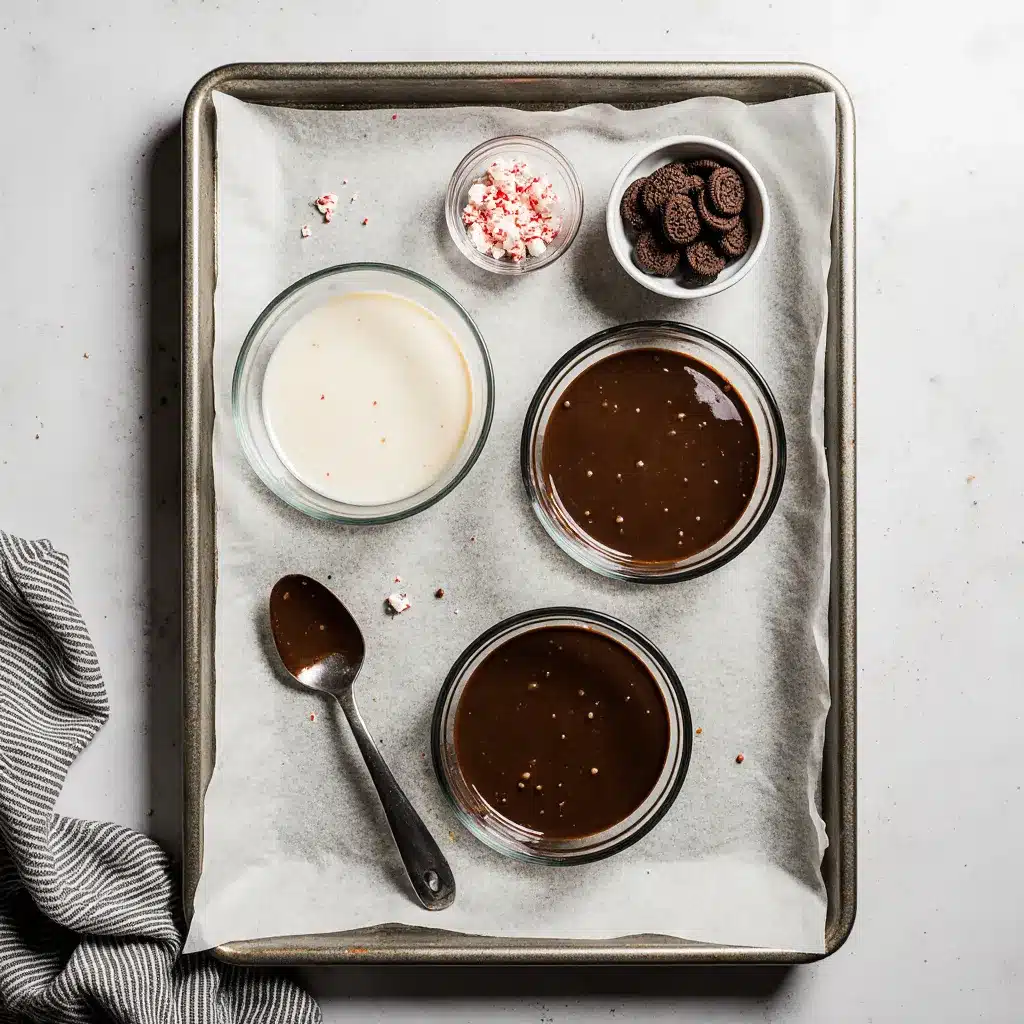
Line an 11×15 rimmed sheet pan with foil or parchment and press into the corners so the surface is flat. In one bowl, melt two and a half cups of white melting wafers at fifty percent power, stirring every thirty seconds until smooth and fluid. In a second bowl, melt one cup of chocolate melting wafers the same way. If a bowl feels too hot, stir in a few unmelted wafers to seed and cool the melt. This gentle approach keeps Peppermint Oreo White Chocolate Bark glossy and reduces bloom.
Dip & lay the base
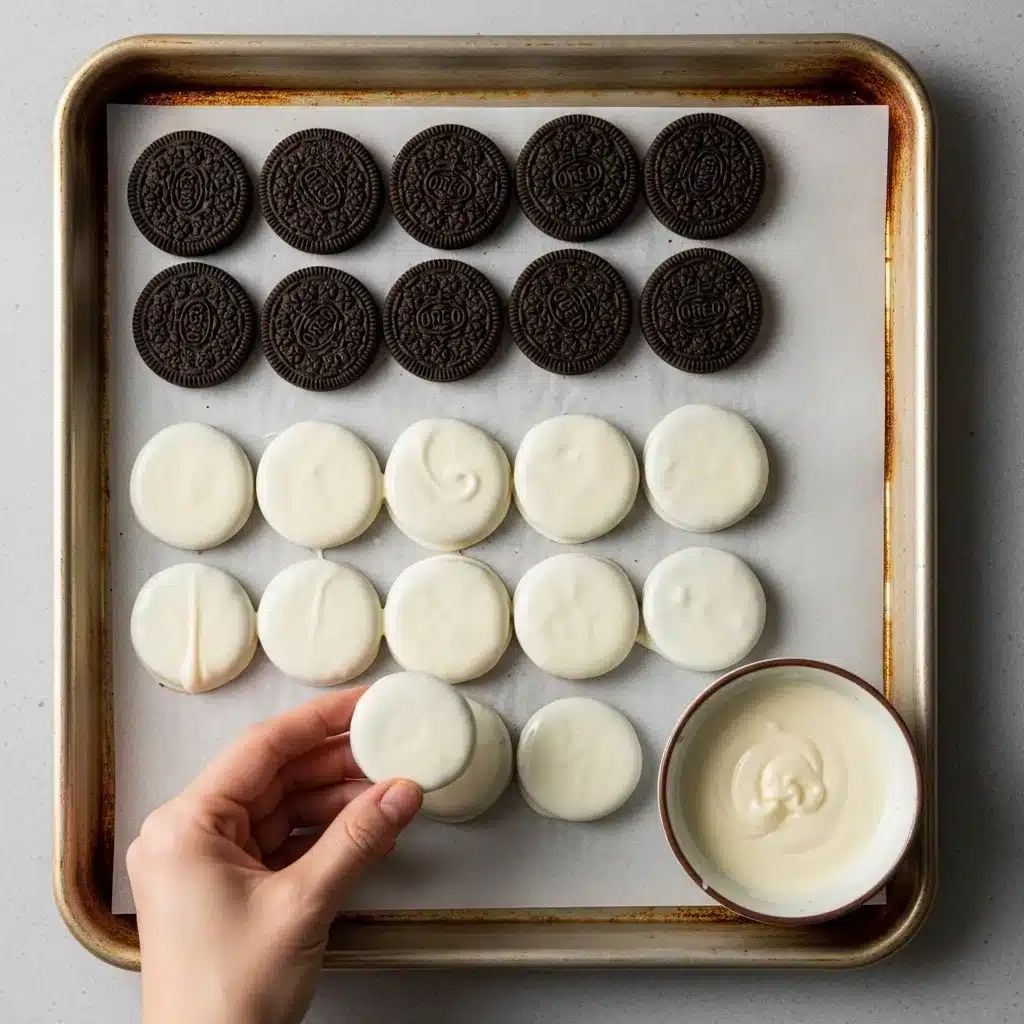
Dip the bottoms of Oreo Thins into the melted white chocolate and lay them flat on the lined pan. Place cookies snug and side by side to form a tight tile. A tiled base gives structure, helps prevent random fracture lines, and keeps Peppermint Oreo White Chocolate Bark thin enough to snap cleanly.
Spread white, swirl dark
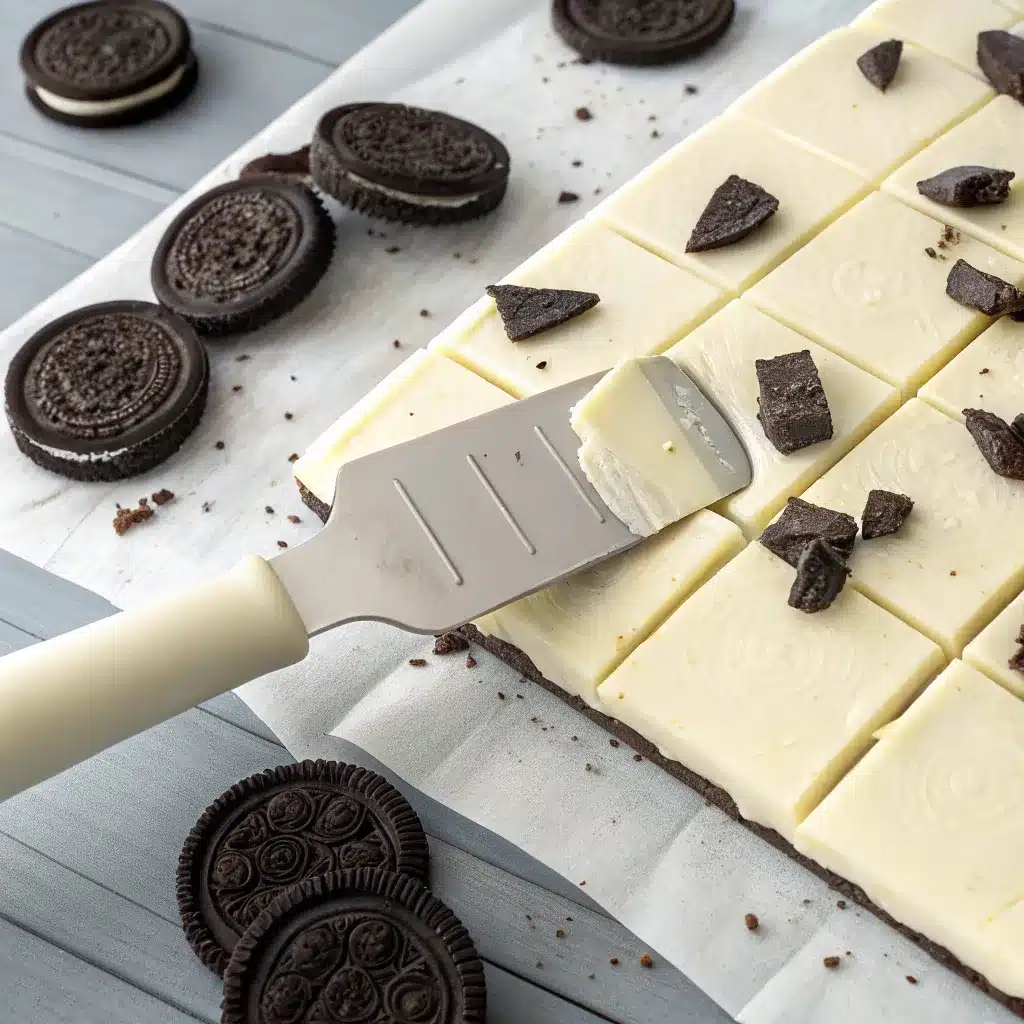
Pour the remaining white chocolate over the cookie base and spread it to a thin, even layer with an offset spatula. Aim for about three to four millimeters. Dot the surface with small spoonfuls of melted chocolate.
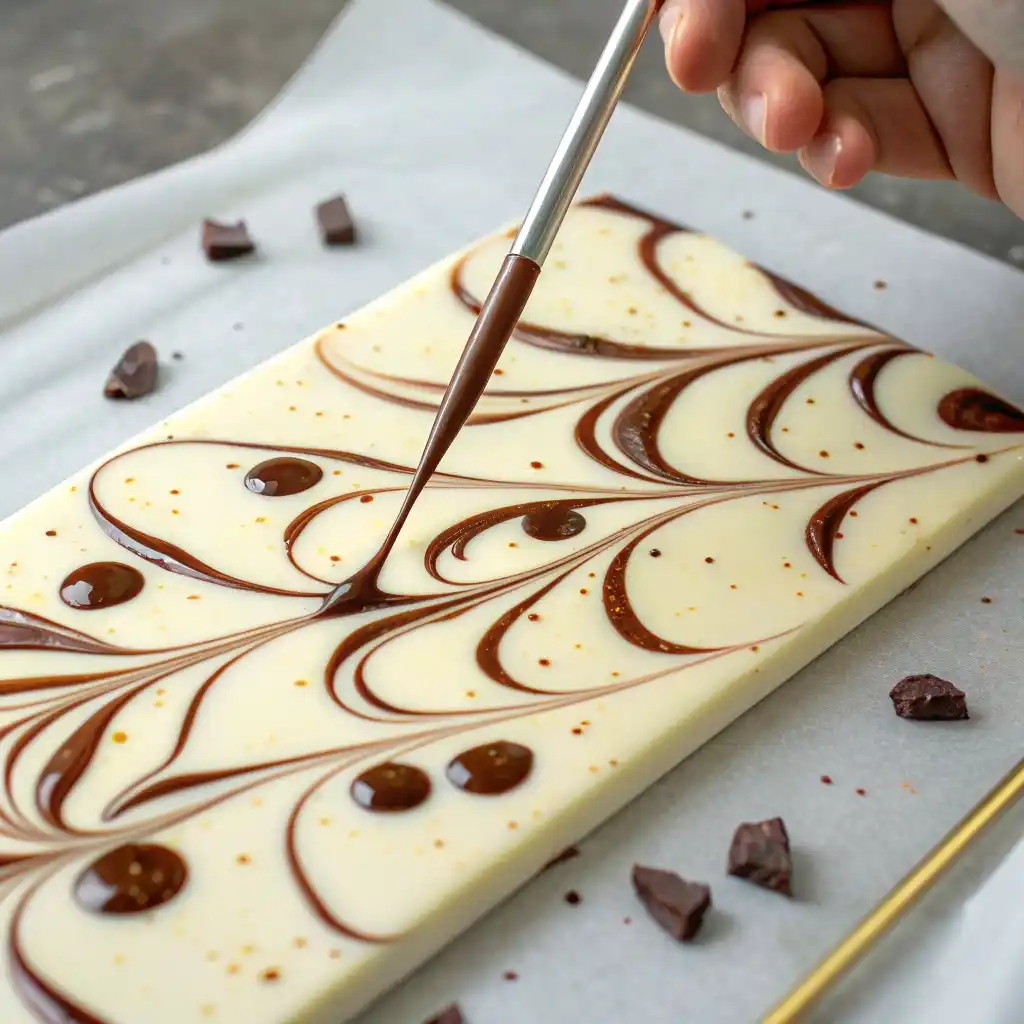
Swirl gently with a skewer or the tip of a butter knife in two or three long passes. Stop while the marbling looks distinct; fewer swirls keep Peppermint Oreo White Chocolate Bark looking crisp and elegant.
Top & set
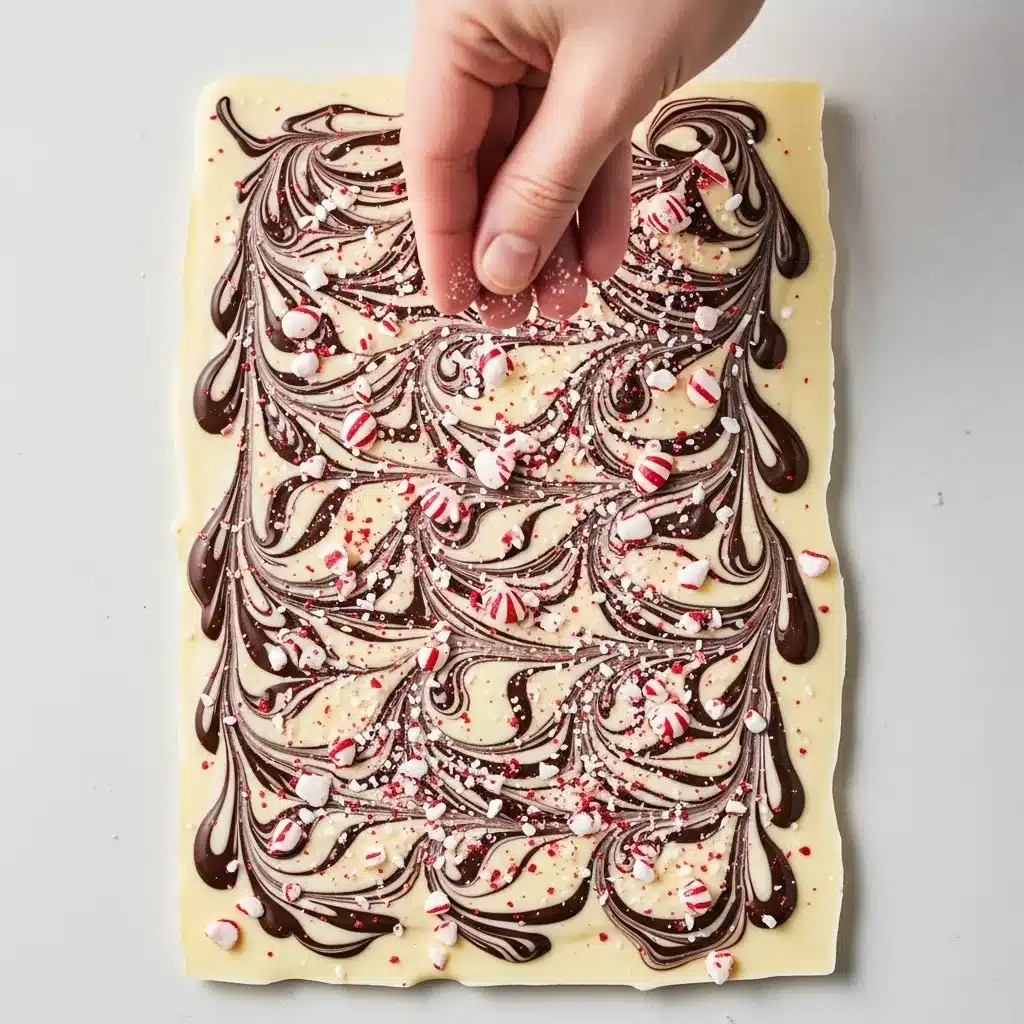
Sprinkle peppermint bits evenly over the glossy surface and press very lightly with fingertips so they bond to the chocolate. Let the pan set at cool room temperature until firm. If the room is warm, chill for five to eight minutes, then bring the pan back to the counter to finish setting. Limiting fridge time helps the finish of Peppermint Oreo White Chocolate Bark stay bright instead of dulling from condensation.
Cut clean shards
For sleek shards, warm a chef’s knife under hot water, dry it well, score gentle lines where you plan to cut, then press down in long, steady strokes. Wipe and rewarm the blade as needed. For a rustic look, lift the slab and break by hand once fully set. Store pieces sealed in an airtight tin. If stacking layers, separate with parchment to protect the marbling and the snap. For a balanced dessert board, add creamy slices of No-Bake Blueberry Cheesecake Recipe beside a plate of Peppermint Oreo White Chocolate Bark so guests can pair cool mint with a smooth, tangy bite.
Pro tips
Keep both chocolates in the comfortable zone of about ninety to ninety-three degrees Fahrenheit so they stay fluid without turning hot and streaky. If streaks appear, stir in a few unmelted wafer seeds to restore shine. Add peppermint bits while the surface is still glossy so the topping adheres. Work on a cool, dry counter and avoid steam or direct sun. These small habits keep Peppermint Oreo White Chocolate Bark sleek, stable, and gift ready.
Make-Ahead, Storage & Shipping
Make-ahead
Peppermint Oreo White Chocolate Bark is built for early prep. Make a full tray up to two weeks before serving or gifting. Cut once fully set, then pack right away so exposed edges don’t pick up moisture. The flavor actually improves by day two as peppermint and vanilla bloom. If you are assembling a dessert board, balance crisp bark with one soft, sliceable item such as Italian Almond Ricotta Cake; the creamy crumb plays well with the mint-cookie snap of Peppermint Oreo White Chocolate Bark.
Storage
Keep shards in an airtight tin or rigid container at cool room temperature. Line layers with parchment so the marbling stays unscuffed and the peppermint bits don’t shed. Avoid sunlight, stovetop heat, and steamy areas; humidity encourages bloom. Do not store near strong-smelling foods, because peppermint can perfume everything in the cabinet. Properly sealed, Peppermint Oreo White Chocolate Bark holds a glossy snap for up to two weeks.
Shipping and gifting
Pack shards snugly so they can’t rattle. Use parchment between layers in metal tins or place portions in cellophane bags, then cushion inside a box. Add a simple tag with the date and flavor. For warm destinations, slip in a small cold pack and choose the fastest shipping option; for cool climates, a well-cushioned tin is enough. Keep parcels out of direct sun on the porch so Peppermint Oreo White Chocolate Bark arrives crisp and clean.
Variations
Triple chocolate peppermint bark
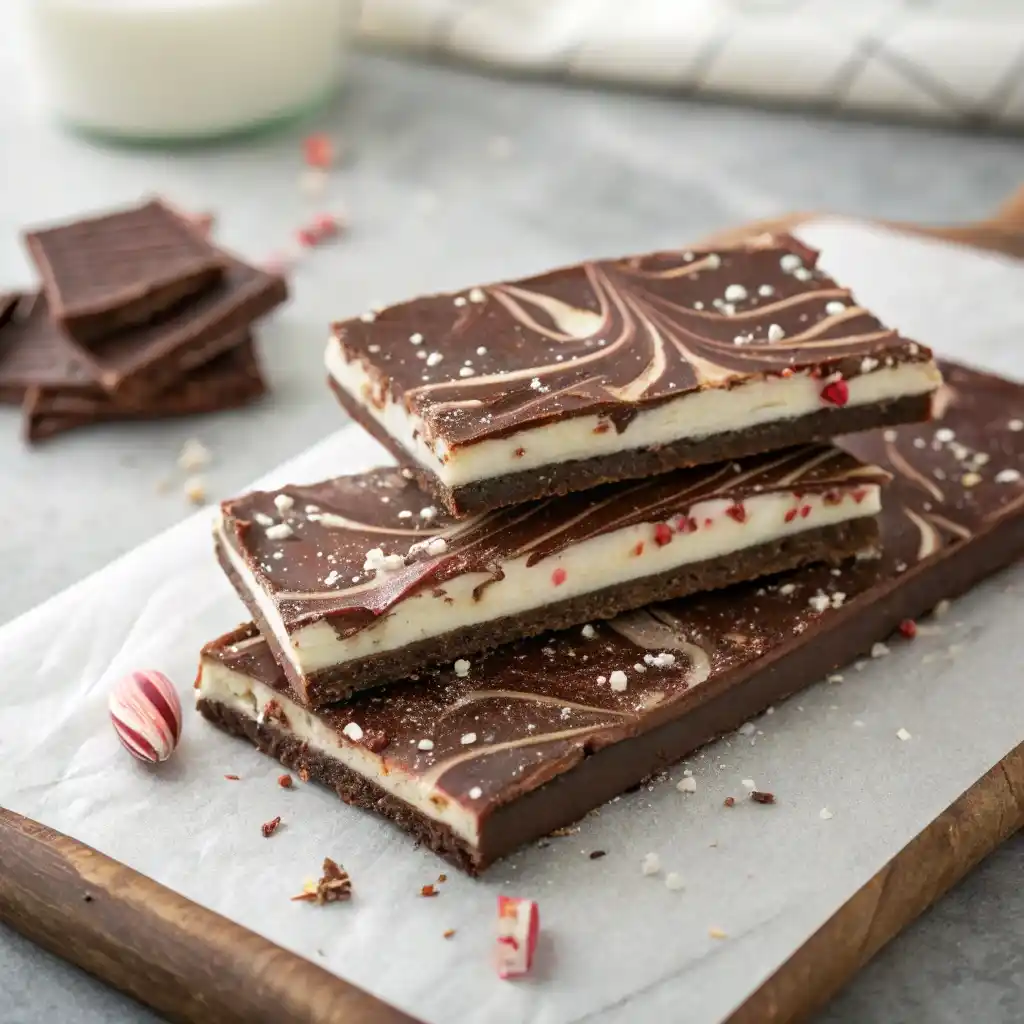
Make a thin milk chocolate base, spread the white layer on top, then add dark chocolate dots and swirl two gentle passes. Keep each layer slim so the bite stays crisp and the marbling shows clearly. This variation keeps the flavor profile of Peppermint Oreo White Chocolate Bark but adds depth from three chocolates without turning the slab thick or chewy. For a clear primer on keeping chocolate glossy with a clean snap as you layer and swirl, see How to Temper Chocolate
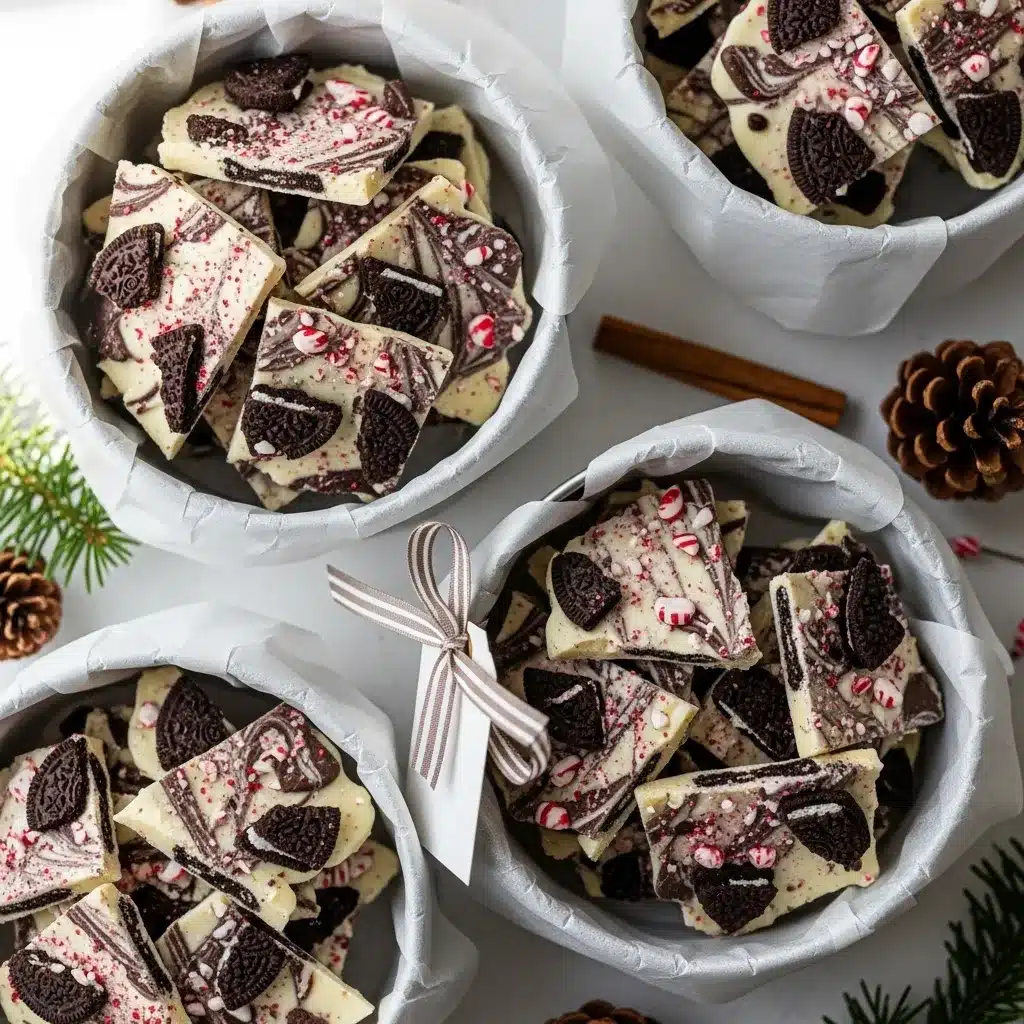
Peppermint cookies and cream bark
Crush five to six extra Oreo Thins and sprinkle them over the glossy top along with peppermint bits. Press very lightly so crumbs adhere to the white layer. This version leans into cookies and cream while the core method still delivers that neat snap you expect from Peppermint Oreo White Chocolate Bark.
Candy cane crunch
Skip the swirl and go all white for a bright holiday look. Spread the white layer thin, shower with a heavier hand of crushed candy canes, and press gently. The result is a clean, high-contrast finish that packs well in tins and breaks into shiny shards with a cool peppermint bite.
Troubleshooting
Gray streaks or dull patches
This is chocolate bloom from heat or humidity. Melt both chocolates at fifty percent power and stir every thirty seconds. If a bowl feels too warm, seed with a few unmelted wafers to stabilize crystals. Let Peppermint Oreo White Chocolate Bark set at cool room temperature instead of a long fridge chill to avoid condensation.
Soft or chewy set
The layer is too thick or the kitchen is too warm. Spread the white chocolate to about three to four millimeters and keep the room cool and dry. If it already set soft, chill the tray for five minutes, bring it back to room temp, and cut. Next batch, thin the layer so Peppermint Oreo White Chocolate Bark snaps cleanly.
Toppings falling off
Peppermint bits were added after the surface dulled. Sprinkle while the chocolate is still glossy and press lightly with fingertips. If an area has already set, warm a teaspoon of white chocolate, flick a few thin ribbons over that spot, top immediately, and let Peppermint Oreo White Chocolate Bark reset.
Muddy swirl
Over-swirling blends the colors. Dot the surface with small pools and make only two or three slow passes with a skewer. Stop when the marbling looks distinct. This restraint keeps Peppermint Oreo White Chocolate Bark looking sharp on trays and in photos.
Jagged breaks or crumbs everywhere
Score first with the tip of a warm, dry chef’s knife, then press straight down in long strokes. Wipe and rewarm the blade as needed. For a rustic look you can break by hand, but scoring gives sleeker shards and tidier edges on Peppermint Oreo White Chocolate Bark.
Chocolate seized during melting
A drop of water or high heat can turn it thick and grainy. Discard seized chocolate and start fresh at half power with frequent stirring. Keep tools bone-dry and cover bowls loosely between bursts so steam doesn’t sneak in. For detailed melting guidance that prevents seizing, follow How to Melt Chocolate Without Seizing
Bark sticks to foil or parchment
The chocolate layer likely seeped under wrinkles. Re-line the pan flat and crease tight into the corners before you begin. If it already stuck, slide a thin offset spatula under the slab to lift it off in sections. Next time, smooth the liner fully so Peppermint Oreo White Chocolate Bark releases in one clean sheet.
Peppermint flavor too strong or too faint
Candy cane bits vary. If it tastes sharp, reduce the topping by a tablespoon on the next batch or mix bits with a spoonful of crushed plain chocolate wafers. If it tastes faint, add a tiny drop of oil-based peppermint extract to the white chocolate and keep the topping level the same so Peppermint Oreo White Chocolate Bark stays balanced.
FAQs
Do I need to temper white chocolate for Peppermint Oreo White Chocolate Bark?
No. Use melting wafers and a light seed step. Melt at fifty percent power, stir often, and if the bowl feels warm, add a few unmelted wafers to stabilize. You’ll get a glossy set and clean snap without tempering tools.
Can I replace Oreo Thins with regular Oreos?
Yes. Halve or lightly crush regular Oreos so the slab stays thin and easy to bite. The bark will be a touch thicker, but the method and marbling remain the same for Peppermint Oreo White Chocolate Bark.
How do I keep peppermint bark from getting sticky?
Work in a cool, dry room. Avoid long refrigeration that can cause condensation. Store shards airtight with parchment between layers so Peppermint Oreo White Chocolate Bark stays dry and shiny.
Why did my bark turn gray or streaky?
That’s bloom from excess heat or humidity. Melt gently at half power, seed with a few wafers, and let Peppermint Oreo White Chocolate Bark set at room temperature. Limit fridge time to a short chill only if your kitchen is warm.
How thick should the bark be?
Aim for about three to four millimeters above the cookie base. Too thick can feel chewy; too thin can shatter. A thin, even layer gives the best snap and clean cuts for Peppermint Oreo White Chocolate Bark.
Can I ship peppermint bark safely?
Yes. Pack shards tightly in tins with parchment layers. Add a small cold pack for warm destinations and avoid direct sun during delivery. Sealed well, Peppermint Oreo White Chocolate Bark ships cleanly and arrives crisp.
Conclusion
Peppermint Oreo White Chocolate Bark brings cool mint, creamy vanilla, and cocoa crunch together in a glossy slab that looks bakery-made and breaks with a clean snap. The method is simple, the swirl stays elegant, and the finish holds for days at room temperature, which makes it perfect for cookie trays, teacher gifts, and last-minute dessert boards. Make a double batch, gift half, and keep the rest for easy entertaining. When you’re ready to serve, pour small mugs of Orange Hot Chocolate Recipe and pass a plate of Peppermint Oreo White Chocolate Bark for a cozy finish to the night.