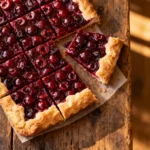
Cherry Slab Pie Recipe — Memories and Big-Batch Baking Joys
Cherry slab pie recipe has always been a family favorite in my kitchen. The first time I made it, I was barely tall enough to reach the counter, standing on a stool next to my grandmother as she rolled out the dough. That rustic aroma of buttery crust and bubbling cherries still brings back memories of summer picnics, county fairs, and cozy holidays where dessert always stole the spotlight.
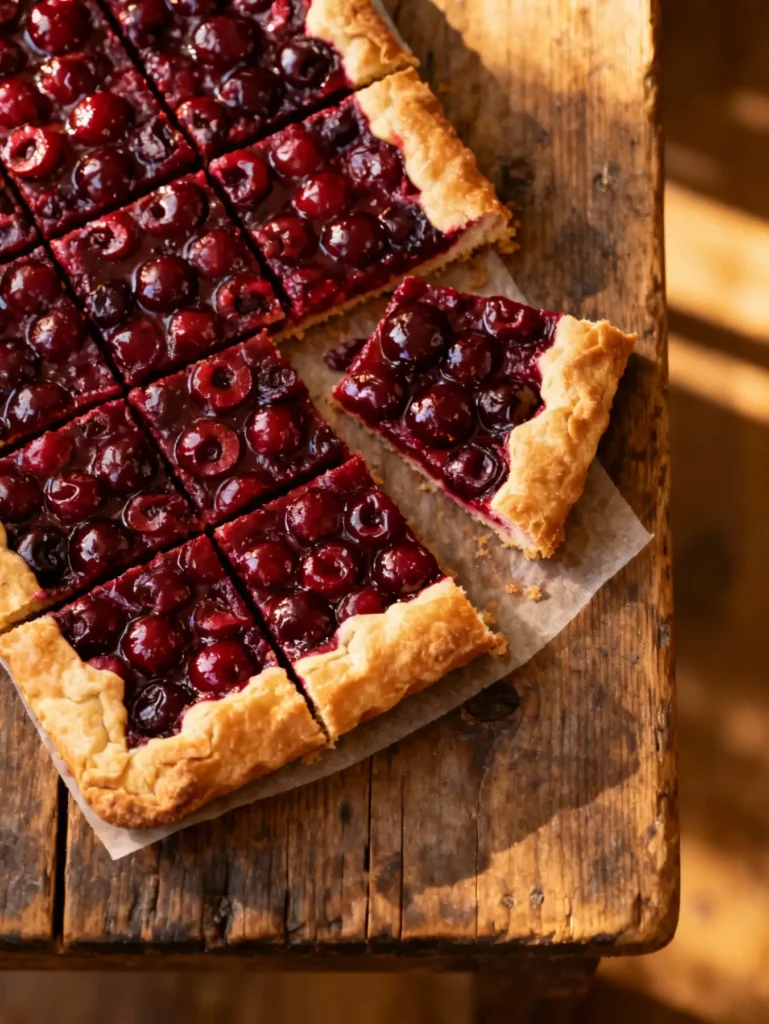
There’s something magical about a slab pie — especially one packed with cherries. It’s bigger than a standard pie, easier to slice for a crowd, and just as flaky and delicious. Whenever I need a reliable dessert that wows guests and leaves no leftovers, I turn to this classic cherry slab pie recipe.
One of the best parts? It’s surprisingly flexible. Whether you’re baking from scratch or in a hurry, there’s a version that works. I’ve included my go-to full recipe below, but I’ll also show you how to whip up a 3-ingredient slab cherry pie when time’s tight. You’ll also get tips on making an easy cherry slab pie recipe using pantry staples, and even a sour cherry slab pie version for those who love that tart punch.
This dessert has seen birthdays, potlucks, and lazy Sundays in our home — and no matter the occasion, it never disappoints. With every golden, juicy slice, it reminds me why I fell in love with baking in the first place: simple ingredients, made with love, bringing people together.
Table of Contents
Table of Contents
Ingredients, Crust Tips & Cherry Variations
What You Need to Make the Perfect Cherry Slab Pie
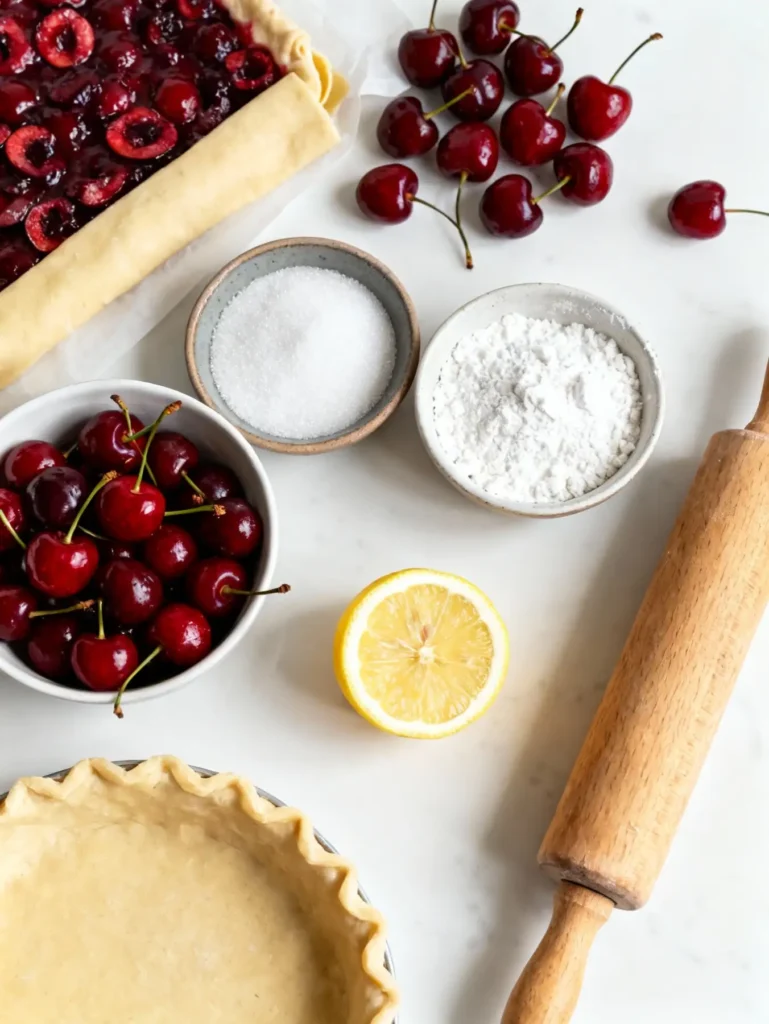
Before you preheat the oven, gather everything you’ll need to make this cherry slab pie recipe stand out. The beauty of slab pies is their simplicity — one large baking sheet, a flaky crust, and a cherry filling that practically sings. Whether you’re going for a classic or the quick 3-ingredient slab cherry pie, start with quality ingredients.
Here’s a handy breakdown of essentials:
| Ingredient | Purpose |
|---|---|
| Pie Crust (homemade or store-bought) | Base and top layer |
| Cherries (fresh, frozen, or canned) | Juicy, fruity center |
| Cornstarch | Thickens the filling |
| Sugar | Adds sweetness |
| Almond extract or vanilla | Flavor boost |
| Lemon juice | Brightens the cherry flavor |
Fresh cherries are ideal in the summer, but don’t stress if you’re baking in winter. Frozen cherries work beautifully too — just thaw and drain them first. Canned cherries are an option, especially for the easy cherry slab pie recipe, but use ones packed in water or juice, not syrup.
For a bolder flavor, try making a sour cherry slab pie. Tart cherries balance beautifully with sugar and offer that old-fashioned zing your guests will rave about.
To amp up your cherry flavor without artificial taste, the pink salt trick recipe adds just a touch of contrast that makes cherries pop.
Cherry Slab Pie Recipe
- Total Time: 1 hour 5 minutes
- Yield: 18–24 servings 1x
Description
This cherry slab pie recipe makes the perfect big-batch dessert for any occasion — sweet, tangy, and easy to slice for a crowd. Whether you make it fully homemade or use shortcuts, it’s guaranteed to satisfy.
Ingredients
- 2 pie crusts (homemade or store-bought)
- 5–6 cups cherries (fresh, frozen, or canned)
- 1 cup granulated sugar
- 3 tablespoons cornstarch
- 1 tablespoon lemon juice
- ½ teaspoon almond extract (optional)
- 1 egg (for egg wash)
- Coarse sugar (for topping)

Instructions
- Preheat oven to 375°F and line a 13×18″ sheet pan with parchment paper.
- Roll out the first crust and press it into the pan, allowing slight overhang.
- In a bowl, mix cherries, sugar, cornstarch, lemon juice, and extract.
- Spread filling evenly over crust. Top with second crust (lattice or full sheet).
- Brush top with beaten egg and sprinkle coarse sugar.
- Bake for 40–45 minutes or until golden and bubbly.
- Cool for 1–2 hours before slicing into squares.
Notes
Use sour cherries for a tart flavor variation.
Cool completely before slicing to help the filling set.
Store leftovers in the fridge for up to 4 days or freeze for up to 3 months.
- Prep Time: 20 minutes
- Cook Time: 45 minutes
- Category: Dessert
- Method: Baking
- Cuisine: American
Nutrition
- Serving Size: 1 slice
- Calories: 320 kcal
- Sugar: 21g
- Sodium: 180mg
- Fat: 14g
- Saturated Fat: 6g
- Unsaturated Fat: 7g
- Trans Fat: 0g
- Carbohydrates: 42g
- Fiber: 2g
- Protein: 3g
- Cholesterol: 32mg
Crust Choices & Pro Tips for a Flaky Finish
When it comes to the crust in any cherry slab pie recipe, you’ve got options. If you’re going all out, a homemade crust is unbeatable — golden, crisp, and rich with butter. But don’t worry, store-bought refrigerated dough is a time-saver that still tastes fantastic.
Here’s a quick overview:
| Crust Type | Pros | Tips |
|---|---|---|
| Homemade Butter Crust | Rich flavor, flaky texture | Chill dough before rolling |
| Store-Bought Pie Dough | Fast, convenient | Bring to room temp before use |
| Puff Pastry | Light, crispy layers | Use for open-faced slab pies |
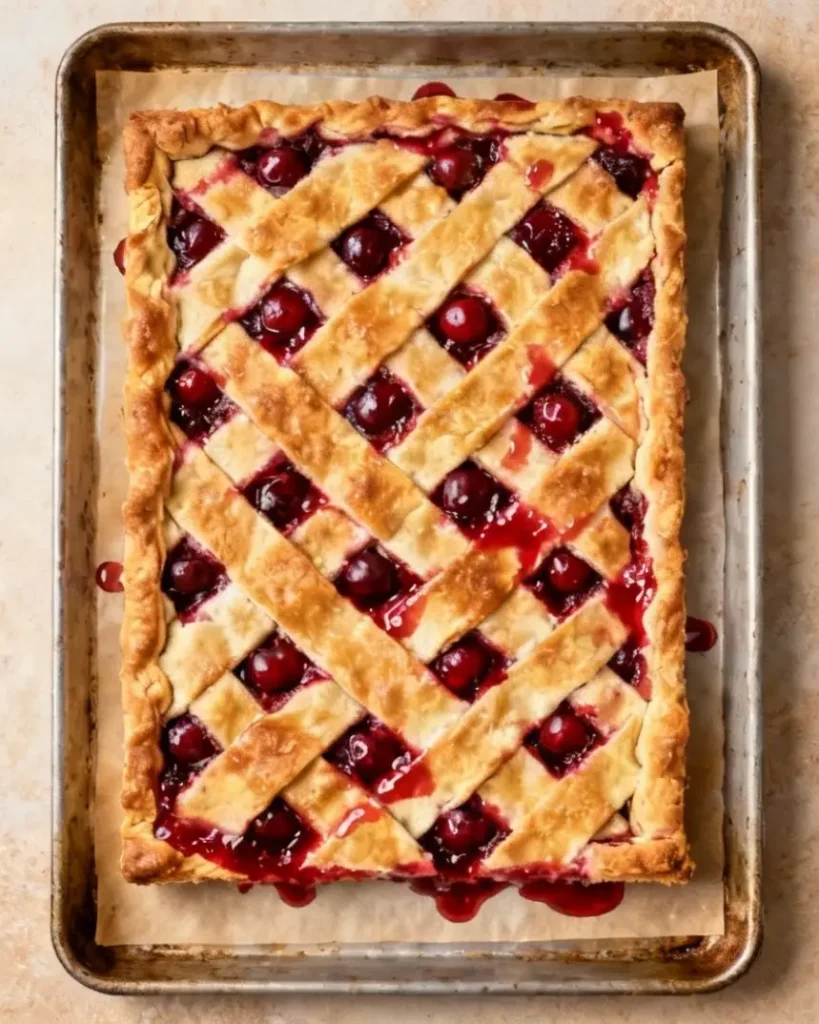
For best results, always roll your dough slightly larger than your baking sheet. Gently press it into corners and up the sides. That helps hold all the cherry filling without overflow. If you’re topping your pie with a second crust, cut slits for ventilation — or go with a lattice pattern for a stunning finish.
Pro tip: brush the top crust with a beaten egg or milk and sprinkle with coarse sugar for that irresistible golden glow.
As you prep your crust and cherries, why not set the mood with a cold drink? This creamy strawberry apple punch recipe pairs beautifully with fruity desserts and makes baking even more fun.
And if you’re planning a dinner party around dessert, think savory first — like a Hawaiian huli huli chicken stack followed by cherry slab pie squares. It’s a pairing your guests won’t forget.
Step-by-Step Cherry Slab Pie Recipe Assembly and Baking
Assembling the Cherry Slab Pie Like a Pro
Now that your ingredients are prepped and your crust is ready, it’s time to assemble your cherry slab pie recipe with confidence. This part is surprisingly quick, and the results are always impressive. Start by preheating your oven to 375°F and lining your jelly roll pan or baking sheet with parchment paper for easy cleanup.
Roll out your bottom crust and gently press it into the pan. Make sure to leave a little overhang on the sides, which helps seal everything later. Spread the cherry filling evenly across the crust. If you’re using fresh cherries, make sure they’re pitted and halved. For frozen, thaw and drain well. Canned cherries? Drain and pat dry for best results.
Here’s a handy guide for baking sheet sizes and crust amounts:
| Pan Size | Crust Needed | Cherry Filling (cups) |
|---|---|---|
| 13×18″ sheet pan | Double batch (top + bottom) | 5–6 cups |
| 10×15″ jelly roll pan | 1.5 batch | 4 cups |
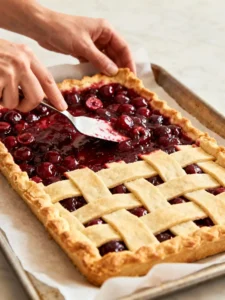
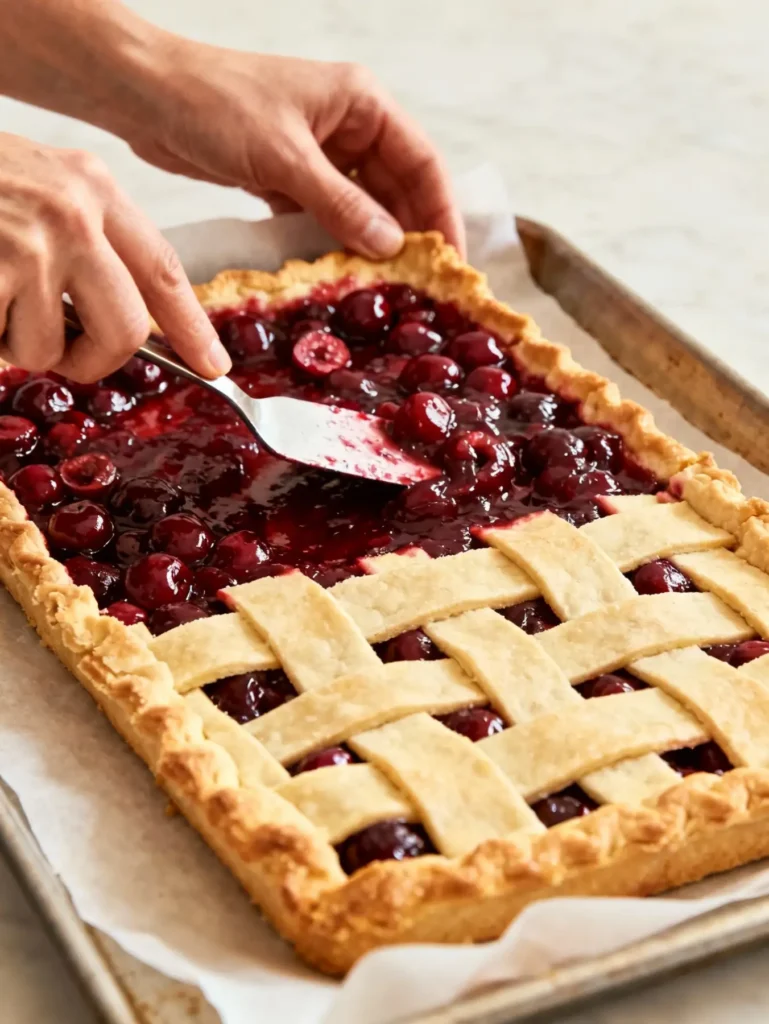
Top your filling with the second crust. You can do a full sheet and cut steam vents, or get creative with lattice strips. Brush the top with egg wash and sprinkle coarse sugar for a golden finish. If you’re going with the 3-ingredient slab cherry pie shortcut using store-bought crust and cherry pie filling, you can still do this step and get great results with less prep.
Before baking, pop the assembled pie in the fridge for 15 minutes. This step helps the crust hold its shape and stay flaky. It’s a trick I learned after a few too many “melted edge” disasters.
Need a sweet treat to serve while it bakes? The caramel apple puppy chow is a fun snack that keeps the kids (and adults) happily distracted while the pie works its magic.
Baking and Cooling the Easy Cherry Slab Pie
Once the pie is chilled, bake it for 40–45 minutes, or until the top is golden and the filling is bubbling through the vents. If the edges start browning too quickly, tent them with foil during the last 10–15 minutes.
You’ll smell when it’s ready — that hypnotic mix of buttery pastry and syrupy cherries is unmistakable. But don’t rush to cut it just yet. For a cherry slab pie recipe to set up properly, it needs time to cool. Let it rest at room temperature for at least an hour. This allows the filling to thicken, so you get clean, neat squares when slicing.
Want a sour edge to your dessert? A sour cherry slab pie bakes the same way, but the filling might bubble a bit more aggressively due to the added juices. Just make sure to protect your oven with a lined baking sheet underneath.
If you’re serving this at a dinner party, plan a fun and satisfying main like the detox southwest chicken soup to keep the meal balanced. Follow it with chilled squares of cherry pie and you’ve got a feast to remember.
Finally, for those who love refreshing side salads with their fruity desserts, a spoonful of the Sbarro cucumber tomato salad adds a cool and tangy contrast to every rich bite.
Creative Ways to Serve and Store Your Cherry Slab Pie Recipe
Serving Suggestions for Cherry Slab Pie
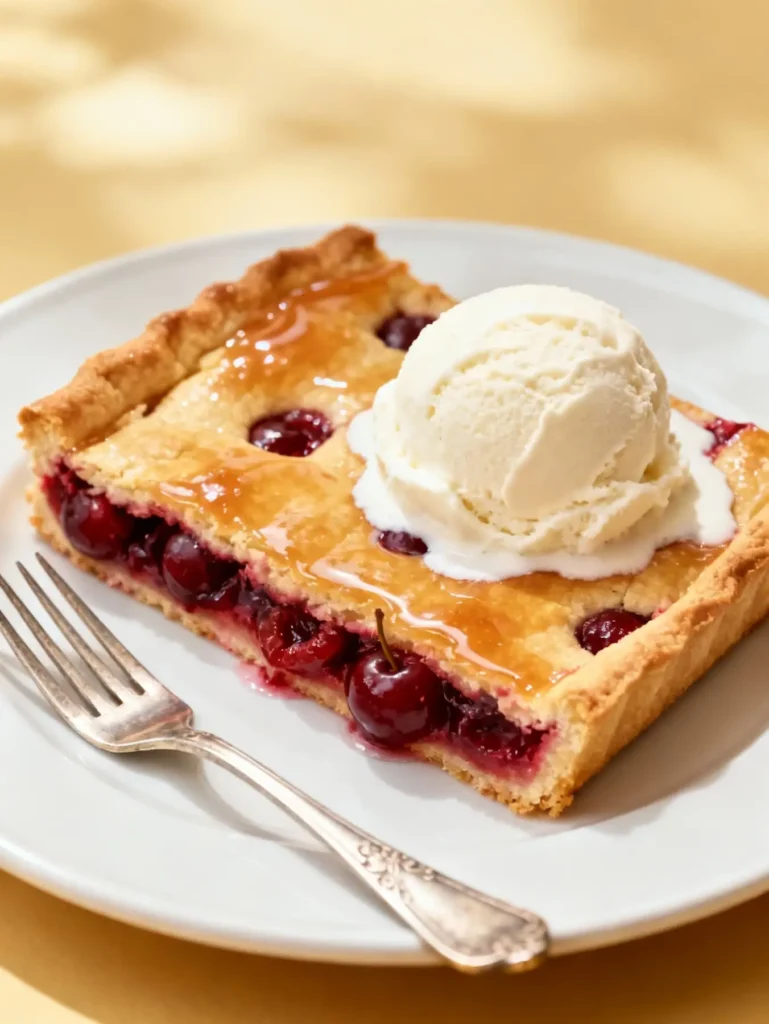
Once your cherry slab pie recipe has cooled and the filling has set, it’s ready to be sliced and shared. One of the biggest perks of slab pies is how easily they serve a crowd. You can cut them into neat squares or generous rectangles, making them ideal for potlucks, school events, and weekend brunches.
For a classic presentation, serve the pie at room temperature with a scoop of vanilla ice cream or a dollop of whipped cream. Want to impress guests? Drizzle each slice with a light glaze made from powdered sugar and lemon juice — the citrus adds a tangy contrast to the cherries.
Here are three popular topping ideas that elevate this easy cherry slab pie:
| Topping | Why It Works |
|---|---|
| Whipped Cream | Light and airy — balances rich cherry filling |
| Vanilla Ice Cream | Classic pairing that melts into the warm pie |
| Powdered Sugar Glaze | Adds shine and a sweet-tart flavor twist |
For summer cookouts, pair the pie with grilled favorites like garlic parmesan cheeseburger bombs to create a bold sweet-and-savory spread.
This dessert also makes a strong showing at brunch tables. You can prep it the night before, chill it, and slice it cold — or bring it to room temp for a softer texture. Serve alongside fruit platters, breakfast casseroles, or a glass of bubbly for an indulgent treat.
Storage, Freezing & Reheating Tips
Made too much? Good news — your cherry slab pie recipe stores beautifully. Let leftovers cool completely, then transfer slices to an airtight container. Store in the fridge for up to four days.
For longer storage, freeze it. Wrap individual slices or full sections tightly in plastic wrap, then foil. Label and freeze for up to three months. When ready to serve, thaw in the fridge overnight and reheat in a 300°F oven for 10–15 minutes.
You can also serve it chilled — especially if you made a sour cherry slab pie, which tends to hold its structure better when cold. That tangy cherry flavor pops even more once it’s cooled down, giving you a firm bite and bold taste.
Planning a picnic or road trip? Pack cooled slices between layers of parchment in a sealed container. It’s way easier than transporting a round pie — no wobbling or spills.
As you prep your next batch or save slices for later, browse Epsilon’s homepage for meal ideas to pair with your pie. Whether it’s something hearty or light, you’ll find the perfect combo.
And if you’re craving a bright, easy snack for later in the week, check out these taco ranch bites in phyllo cups. They’re fun, fuss-free, and balance sweet desserts like cherry pie perfectly.
Finally, if you’ve followed the easy cherry slab pie recipe, storing and reheating is even simpler. Store-bought crusts and canned fillings are slightly sturdier, holding up well after refrigeration or freezing. So if you’re prepping in bulk for a party or bake sale, this shortcut works like a charm.
Cherry Slab Pie Recipe vs. Popular Variations: What’s the Difference?
Classic Cherry Slab Pie vs. 3-Ingredient Slab Cherry Pie
A classic cherry slab pie recipe involves layering homemade or store-bought crust with a juicy cherry filling made from scratch. It’s flavorful, rustic, and ideal when you’ve got a bit of time to bake with care. It lets you adjust sweetness, texture, and cherry intensity to your liking. Plus, you can mix in spices like cinnamon or a splash of almond extract to personalize it.
On the other hand, a 3-ingredient slab cherry pie is perfect for busy bakers or those just starting out. All you need is pre-made pie crust, canned cherry pie filling, and an egg for brushing the top. It’s fast, fuss-free, and still totally delicious. You lose a bit of control over flavor and texture, but it’s a lifesaver when you need a dessert in under an hour.
Here’s a side-by-side comparison:
| Feature | Classic Cherry Slab Pie | 3-Ingredient Slab Cherry Pie |
|---|---|---|
| Prep Time | 60–75 minutes | 20–25 minutes |
| Flavor Control | High — fully customizable | Low — canned filling taste |
| Crust Type | Homemade or store-bought | Pre-made crust only |
| Best For | Family gatherings, holidays | Quick desserts, kids’ parties |
Whether you go full homemade or lean on shortcuts, both styles deliver on taste and satisfaction.
Internal pairing idea? Try the fast pie with something bright and citrusy like this pineapple bake recipe Longhorn-style for a sweet-and-tart flavor duo.
Sour Cherry Slab Pie vs. Easy Cherry Slab Pie Recipe
The biggest difference between a sour cherry slab pie and an easy cherry slab pie recipe lies in the flavor profile and ingredient choice. Sour cherries (also known as tart cherries or Montmorency) have a vibrant, tangy bite that’s less sugary. They’re perfect if you enjoy a punchier, less sweet dessert.
To make it, you’ll likely need a bit more sugar and a touch of cornstarch to balance the acidity. Sour cherry slab pie is often described as “old-school,” since many classic bakeries used sour cherries before sweet varieties became common.
In contrast, an easy cherry slab pie recipe typically uses canned cherry pie filling (usually sweetened Bing cherries) and pre-rolled crusts. It’s soft, sweet, and always crowd-friendly — especially with ice cream.
Here’s when to go with each:
- Pick sour cherry slab pie when you want a bold, grown-up flavor.
- Choose easy cherry slab pie for a universally loved, mellow dessert.
You can even serve both at events to offer variety — just label them so guests can pick their favorite!
And for a bonus tip: balance sour pie with a smooth drink like this creamy strawberry apple punch, or serve sweet pie after a light meal like Sbarro’s cucumber tomato salad.
Frequently Asked Questions About Cherry Slab Pie Recipe
How do you keep a cherry pie from being runny?
The secret to avoiding a runny cherry slab pie recipe is proper thickening and cooling. Use cornstarch, tapioca starch, or flour in your cherry filling. For every 4–5 cups of cherries, you’ll want about 3 tablespoons of cornstarch. Mix it well with the sugar and cherries before baking.
Also, resist the urge to slice the pie right after pulling it from the oven. Let your pie cool for at least 1–2 hours. This helps the filling set properly and prevents that disappointing soupy middle.
Bonus tip: If you’re using fresh or frozen cherries, drain any excess juice before mixing your filling — this small step makes a massive difference.
Can I use canned cherries for cherry slab pie?
Yes, canned cherries work beautifully in an easy cherry slab pie recipe. Just make sure you choose cherries packed in water or juice, not syrup. Drain them well, and adjust the sugar to taste since canned cherries may already be slightly sweet.
What is the difference between a slab pie and a regular pie?
The most obvious difference lies in shape and size. A traditional pie is round and made in a 9-inch dish. A cherry slab pie recipe, on the other hand, is baked on a sheet pan or jelly roll pan. It’s rectangular, thinner, and serves 2–3 times more people — ideal for large gatherings or events.
Can you freeze cherry slab pie?
Absolutely — your cherry slab pie recipe is freezer-friendly. To freeze, allow the pie to cool completely. Wrap individual slices or full sections in plastic wrap and then foil. Place in a labeled freezer bag or airtight container. It’ll keep for up to 3 months.
What’s the best crust for a cherry slab pie?
The best crust for a cherry slab pie recipe depends on your taste and time. A homemade all-butter crust gives you rich flavor and beautiful flake. If you prefer convenience, refrigerated pie dough is a solid shortcut.
How many people does a cherry slab pie serve?
A full cherry slab pie recipe baked in a standard 13×18-inch sheet pan can serve 18 to 24 people, depending on how large you slice it. That’s double or even triple the servings of a standard 9-inch round pie.
Conclusion
The cherry slab pie recipe isn’t just another dessert — it’s a celebration on a sheet pan. From the buttery crust to the rich cherry filling, every bite delivers comfort, color, and just the right touch of nostalgia. Whether you go with the full recipe, the easy cherry slab pie, or a fast 3-ingredient slab cherry pie, you’re guaranteed smiles all around.
Perfect for parties, potlucks, or weekend baking therapy, this recipe adapts to any season and skill level. With just a little effort and love, you’ll create a dessert that’s timeless, tasty, and totally shareable.
Want more inspiration? Check out the full collection of slab pie ideas at AllRecipes Slab Pie Collection.