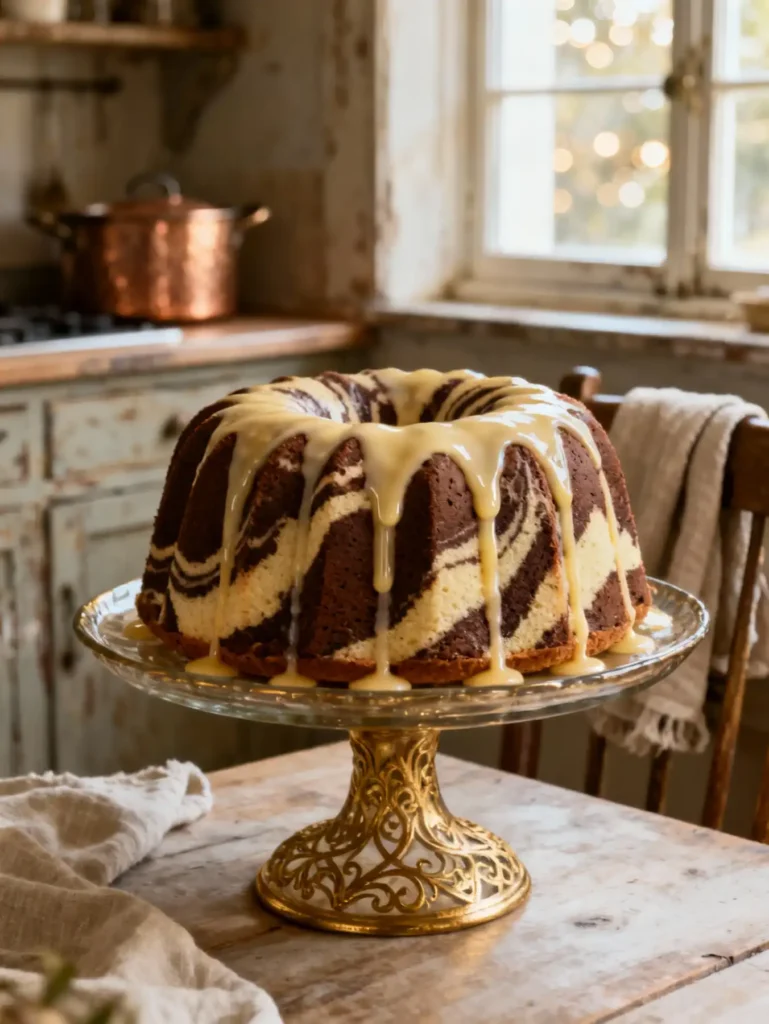
Easy Marble Bundt Cake Recipe
If you’ve been hunting for the perfect easy marble bundt cake recipe, this is it. I’m Chef Adriana, and this cake has been a favorite in my home for years. It brings back memories of Sundays spent baking with my grandmother, who passed down her love of German marble cake to me. Her secret? Keep it simple, moist, and always use buttermilk. That old-school richness paired with a modern swirl method makes this bundt cake both nostalgic and irresistibly delicious. If you’re as into heritage sweets as I am, you’ll probably also love this retro German Chocolate Cake from 1957—a true throwback favorite.
This recipe doesn’t require a mixer, fancy ingredients, or a ton of skill—just two bowls, a whisk, and a bundt pan. Whether you’re baking for a special event or an afternoon pick-me-up, this cake delivers. In this first part, I’ll walk you through what makes this cake incredibly moist and why it stays that way for days.
Table of Contents
Table of Contents
Why This Marble Bundt Cake is So Moist
The Role of Buttermilk in a Marble Buttermilk Bundt Cake
Buttermilk is the unsung hero in this easy marble bundt cake recipe. Unlike regular milk, it brings a slight tang that balances the sweetness of the vanilla batter and deepens the cocoa notes in the chocolate swirl. But what really makes it shine? Acidity.
Acid reacts with baking soda to create carbon dioxide, giving your cake an airy lift. Buttermilk also helps break down gluten strands, which results in a tender, velvety crumb instead of a chewy or dry one. This is why even after sitting overnight—covered loosely on the counter—this cake remains just as delicious as it was straight out of the oven.
In fact, if you’ve ever tried the moist texture of the Quick and Easy Gingerbread Cake, you already know how crucial the right liquid base is. Buttermilk outperforms both regular milk and water in structure, rise, and flavor. It’s an essential element you should never skip—unless you’re substituting it with a mix of milk and lemon juice or vinegar.
Another perk of using buttermilk in bundt cakes is how beautifully it complements the rich chocolate swirl. While milk often fades into the background, buttermilk amplifies every flavor it touches.
If you want that old-fashioned, homemade taste with modern ease, buttermilk is your best friend. No sour cream needed. No boxed mix tricks. Just real ingredients with real results.
Why Oil Works Better in an Easy Marble Bundt Cake Recipe with Oil
Butter is classic, but oil makes this cake a moisture marvel. This easy marble bundt cake recipe uses vegetable oil to ensure that every bite is luscious, soft, and rich. Unlike butter, which hardens as it cools, oil stays liquid at room temperature. That means the cake stays fresh longer—and that’s a big deal when you’re baking ahead for a holiday or party.
Now, let’s get into how this works. Oil coats the flour proteins more effectively than butter, limiting gluten formation. The result? A smoother, more tender crumb. This trick is especially important in bundt cakes, which are baked longer due to their thickness and intricate shape. You want a cake that stays soft through and through, not one with crispy edges and a dry center.
Many modern bakers are switching to oil in bundt cakes because it also mixes easily by hand—no creaming necessary. You just whisk, pour, and bake. That makes this recipe ideal for beginners, or anyone short on time.
For extra depth, I like to add a touch of melted butter to the chocolate batter, but the base stays oil-based. It’s the perfect compromise: rich flavor with unbeatable texture.
Want another stunning cake that keeps well and impresses every time? Check out this Upside Down Pear Gingerbread Cake—also oil-based and undeniably beautiful.
The bottom line: oil guarantees your marble bundt cake turns out soft, springy, and just the right amount of rich. Even on day three, it’s just as good as the day you made it.
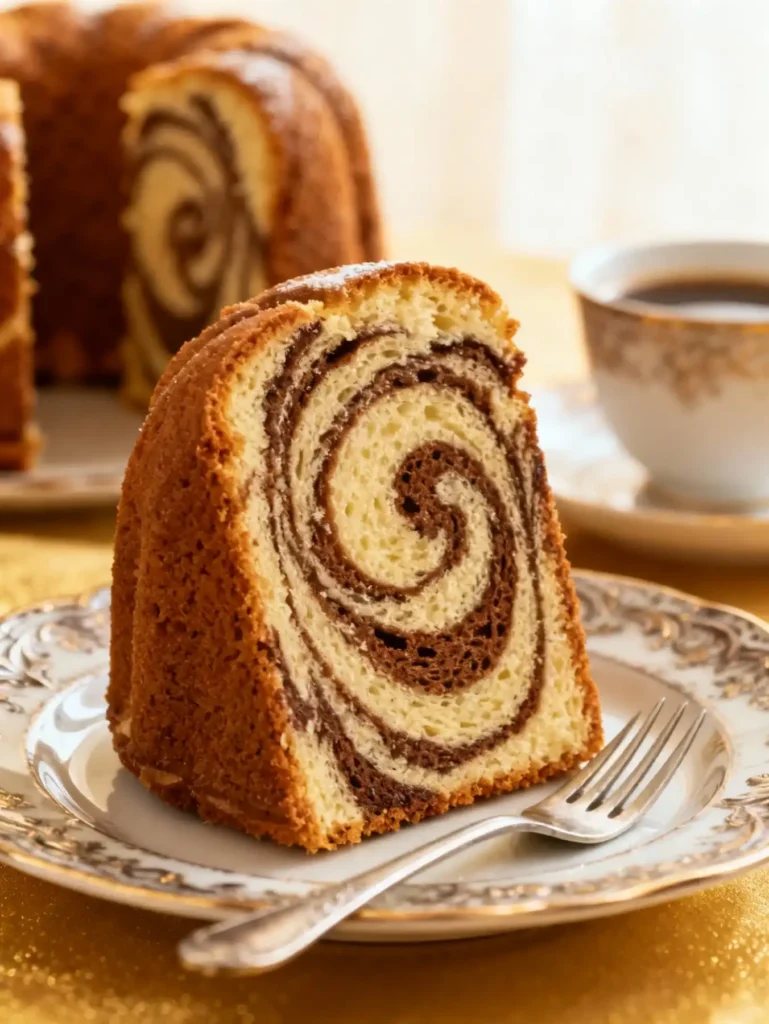
How to Get Perfect Swirls in a Marble Bundt Cake
Step-by-Step Guide: Marble Swirl Technique for Beginners
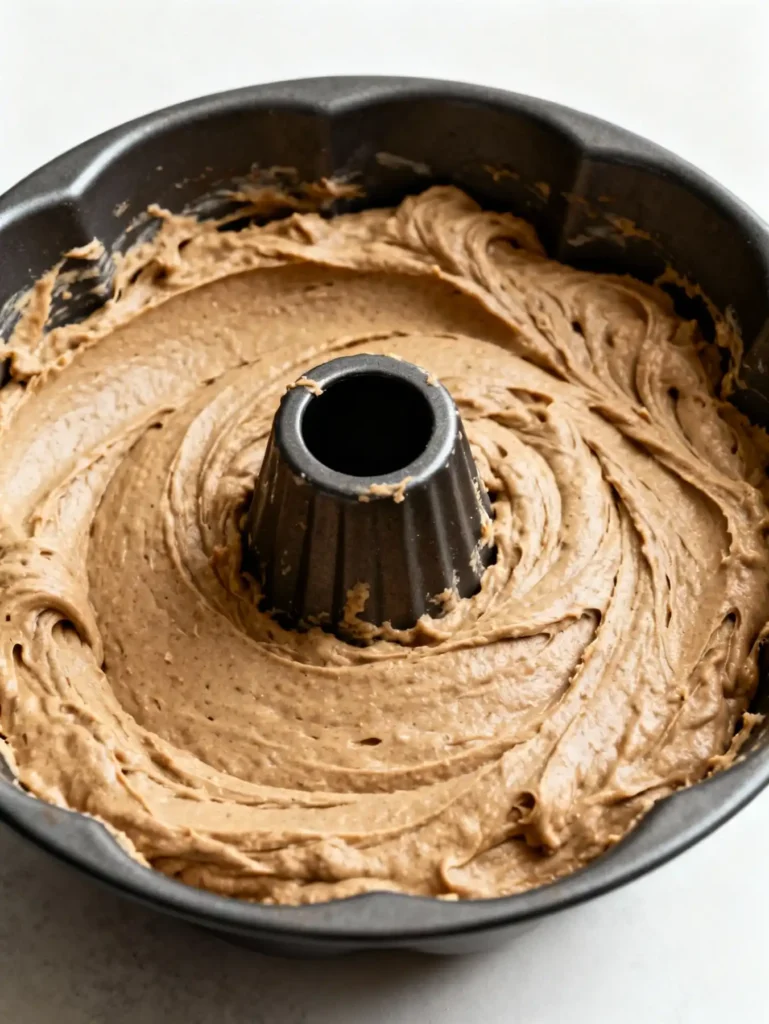
Once you’ve prepared your vanilla and chocolate batters for this easy marble bundt cake recipe, it’s time to make magic happen—those stunning chocolate swirls. While it might look fancy, creating perfect marbling is all about a light hand and a good eye. You don’t need pastry chef training to pull this off. Just follow this process, and you’ll get beautiful, bakery-style results every time.
Start by greasing your bundt pan generously—get into every crevice. Pour half the vanilla batter into the pan, followed by half of the chocolate batter. Repeat the process with the remaining vanilla and chocolate batters. Now comes the fun part.
Use a butter knife or long skewer to create a gentle swirling motion through the batters. Insert the knife vertically, then zig-zag in a figure-eight pattern throughout the pan. Don’t stir—this isn’t a smoothie. You want to create contrast, not blend the two batters into one.
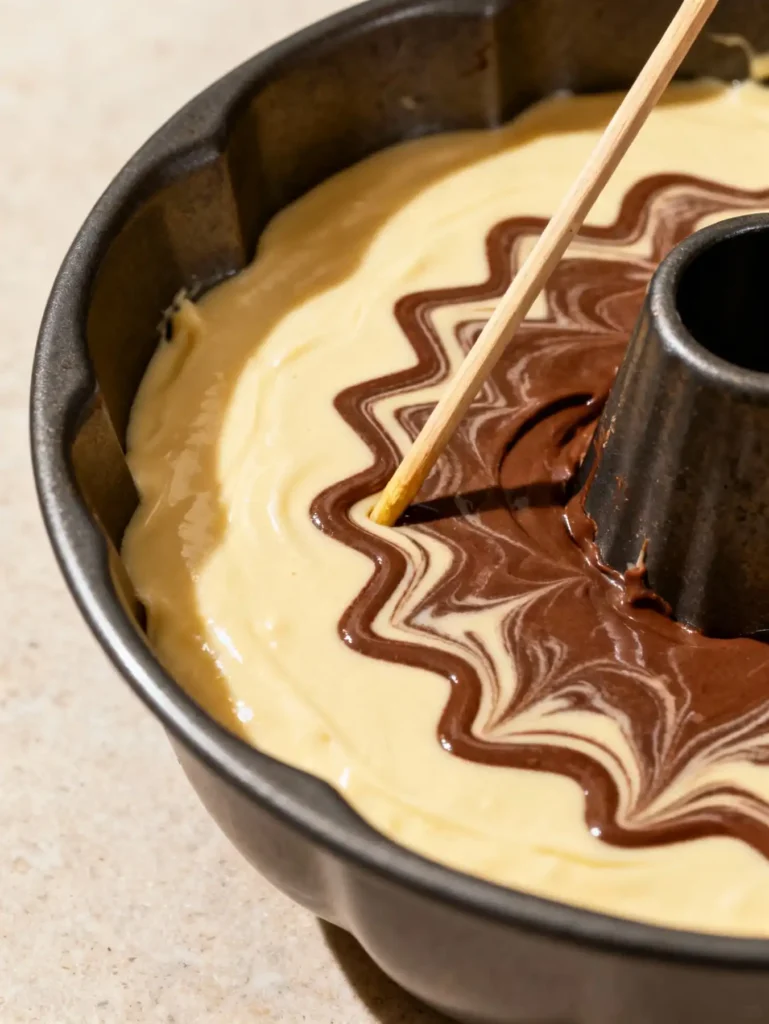
The key is restraint. Three or four swirls will give you just the right balance of chocolate and vanilla without muddying the layers. If you’re ever unsure how much swirling is too much, think of layered pies like this Cherry Slab Pie Recipe where visual distinction is part of the charm.
Another trick? Tap the bundt pan lightly on the counter before baking. This evens out the batter and helps eliminate air bubbles without disturbing your swirls.
Want extra flair? Add a dollop of the chocolate batter on top and swirl it with just the tip of your knife before baking. When sliced, those ribbons will look hypnotic and give you that classic marbled effect everyone loves.
Practice makes perfect, but even your first try will look impressive. This technique is simple, foolproof, and guaranteed to impress at any gathering.
Mistakes to Avoid with Swirling in a German Marble Cake
Even the best recipes can go sideways with a heavy swirl hand. When it comes to this easy marble bundt cake recipe, one of the most common issues beginners face is overmixing during the marbling step.
Too much swirling blends the batters into one uniform shade of brown, which defeats the entire purpose. What you want are distinct chocolate and vanilla patterns—not chocolate-colored cake. It’s tempting to keep swirling, but resist the urge. Remember, fewer swirls = sharper contrast.
Another mistake? Using warm batter. If your chocolate mixture is too hot (especially if you melted butter or chocolate), it can melt the vanilla batter and ruin the structure. Always allow your ingredients to cool slightly before assembling your cake. It’s a simple tip that makes a huge difference.
Texture also plays a role. If your chocolate batter is thicker or thinner than the vanilla one, the layers may sink or rise unevenly. To avoid this, make sure both batters have a similar consistency before pouring them into the pan.
And don’t forget the pan prep. A poorly greased bundt pan leads to stuck edges that ruin your beautiful swirl pattern when unmolding. I like to use a baking spray with flour or make a homemade pan-release paste. For more tips on sticking prevention, check out the texture-perfect results from this Strawberry Shortcake Recipe. Soft textures and clean releases start with preparation.
Also avoid tapping the pan too hard. A gentle tap settles the batter without disrupting the swirl. A hard bang can mix the layers too much.
Lastly, patience matters. Let the cake cool for at least 15–20 minutes in the pan before flipping it. That rest time allows the cake to firm up slightly and release cleanly—leaving your swirl pattern undisturbed and picture-perfect.
If you’ve ever had a bundt cake come out “all one color,” it wasn’t the recipe—it was probably just an aggressive swirl. This is where art meets baking. A little restraint goes a long way in keeping your marble masterpiece intact.
Baking & Cooling Tips for the Perfect Bundt Shape
Best Pans for Easy Marble Bundt Cake Recipe from Scratch
The right bundt pan can make or break your easy marble bundt cake recipe. Literally. While the batter and baking technique are essential, your pan is what gives the cake its personality—those classic ridges, peaks, and curves that make bundt cakes instantly recognizable.
Non-stick pans are your safest bet, especially ones with a dark finish for even baking. The coating helps the cake release cleanly, and the color ensures consistent heat distribution. But not all non-stick pans are created equal. Choose one that’s sturdy and has a bit of weight to it—cheap pans warp, and that leads to uneven baking.
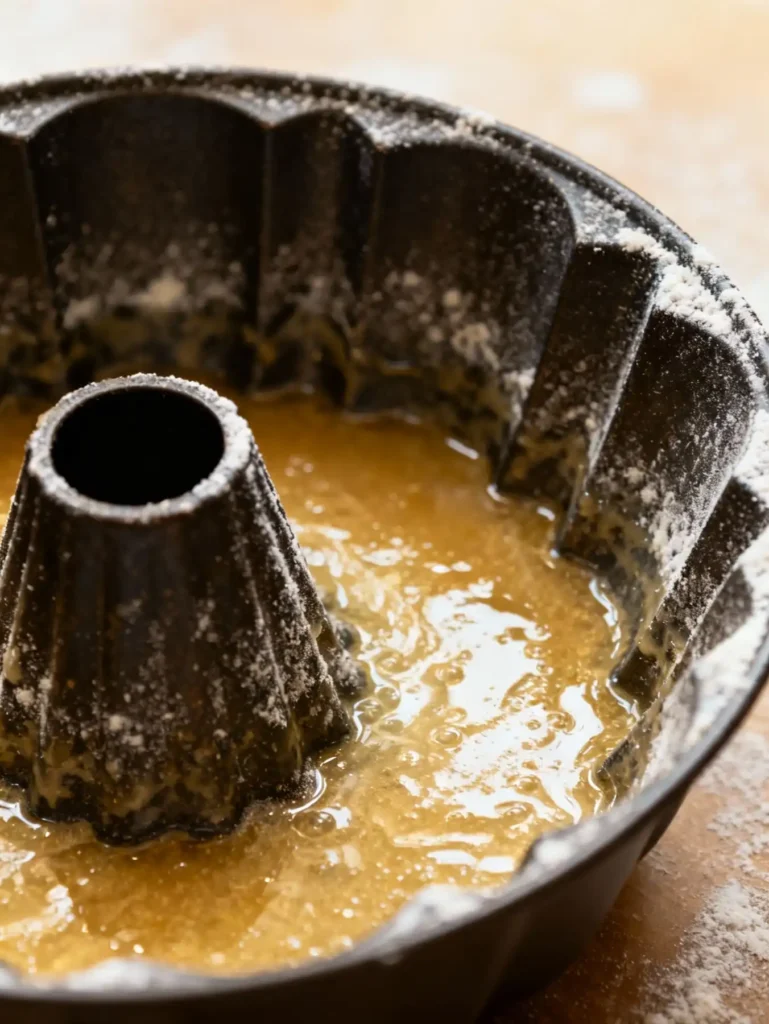
If you’re aiming for intricate swirl designs or decorative edges, a Nordic Ware pan is my top pick. Their design molds are precise, and cakes come out looking like something from a bakery window. Just be sure to grease them thoroughly—even the best non-stick pans need backup.
For this recipe, a 10- to 12-cup bundt pan is ideal. Anything smaller risks batter overflow; anything too large can flatten the cake and dry it out. If you’re using a silicone bundt mold, keep in mind they don’t conduct heat as well, so baking times might stretch a little longer.
Before you pour the batter, coat every ridge and crevice with butter or baking spray. Then, add a dusting of flour—or better yet, cocoa powder if you want to avoid white streaks on your chocolate swirls.
Pan design can also influence texture, like it does in this beautiful Upside Down Pear Gingerbread Cake. A good bundt pan doesn’t just bake well—it makes your cake stand out.
One last tip? Always place your bundt pan on a baking sheet before putting it in the oven. It stabilizes the pan and catches any unexpected spills—because no one wants to clean cake batter off the oven floor.
Cooling, Releasing, and Serving the Cake Right
You’ve baked your gorgeous marble buttermilk bundt cake, and the scent is making your whole kitchen feel like a bakery. Now comes the crucial part: cooling and releasing it without tearing that perfect swirl.
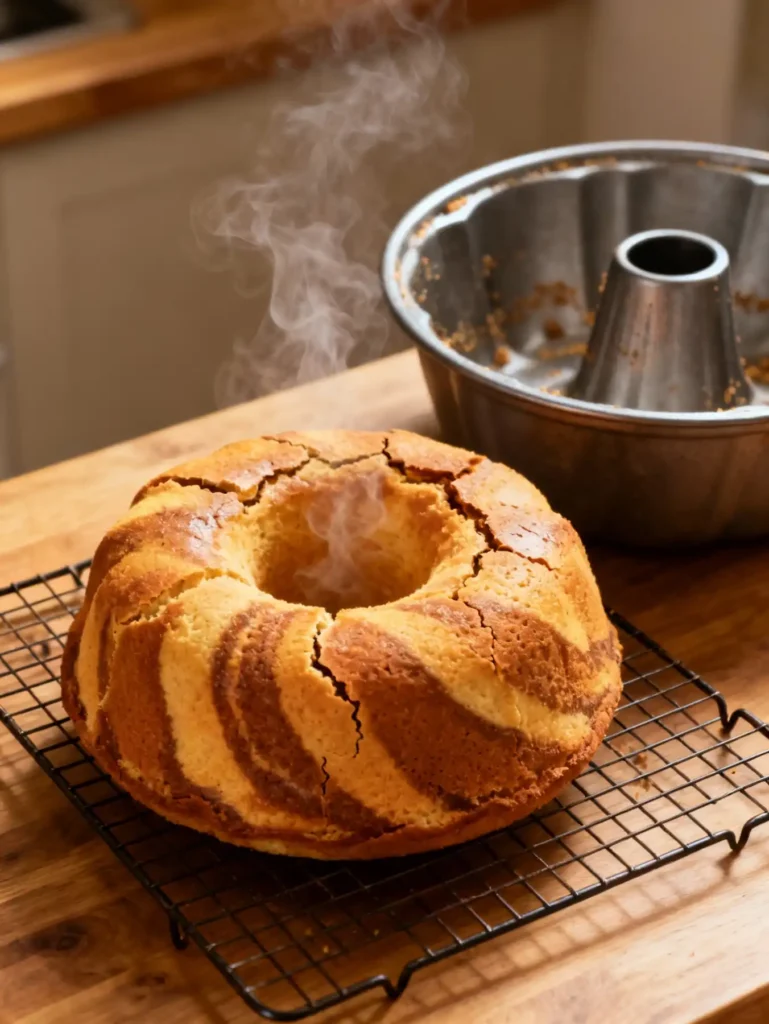
The golden rule? Let it cool in the pan—but not too long. Fifteen to twenty minutes is the sweet spot. This allows the cake to firm up enough to hold its shape but not so much that it sticks. Set the pan on a wire rack and walk away (I know it’s hard!).
When the time’s up, place a serving plate over the bundt pan and flip with confidence. Give the pan a few gentle taps if needed. You should hear a soft thud as the cake releases. If it resists, don’t panic—wrap a hot towel around the base for a few minutes to loosen it up.
Avoid letting the cake cool completely in the pan, as condensation can cause it to stick. That’s the fastest way to ruin your swirl masterpiece.
Once released, allow the cake to cool entirely on a wire rack. This keeps the bottom from getting soggy. If you’re glazing the cake, wait until it’s room temperature so the icing sets instead of melting.
Looking for more inspiration on how to serve cake beautifully and mess-free? The Italian Almond Ricotta Cake is a great example of clean slices and elegant presentation. It also holds its shape beautifully, just like a well-baked marble bundt.
If you’re prepping for a party or event, this cake can be made a day ahead. Wrap it tightly in plastic wrap once cooled, and keep it at room temperature. It actually gets more flavorful overnight—a rare and wonderful baking bonus.
Serving tip: Dust with powdered sugar, or drizzle with a vanilla glaze right before guests arrive. It adds sparkle and makes the swirls pop.
Don’t rush the cool. Let the cake finish its journey with care, and you’ll be rewarded with a stunning dessert that tastes as good as it looks.
Flavor Variations on the Classic Marble Buttermilk Bundt Cake
From Vanilla-Chocolate to Orange-Chocolate: Add Your Twist
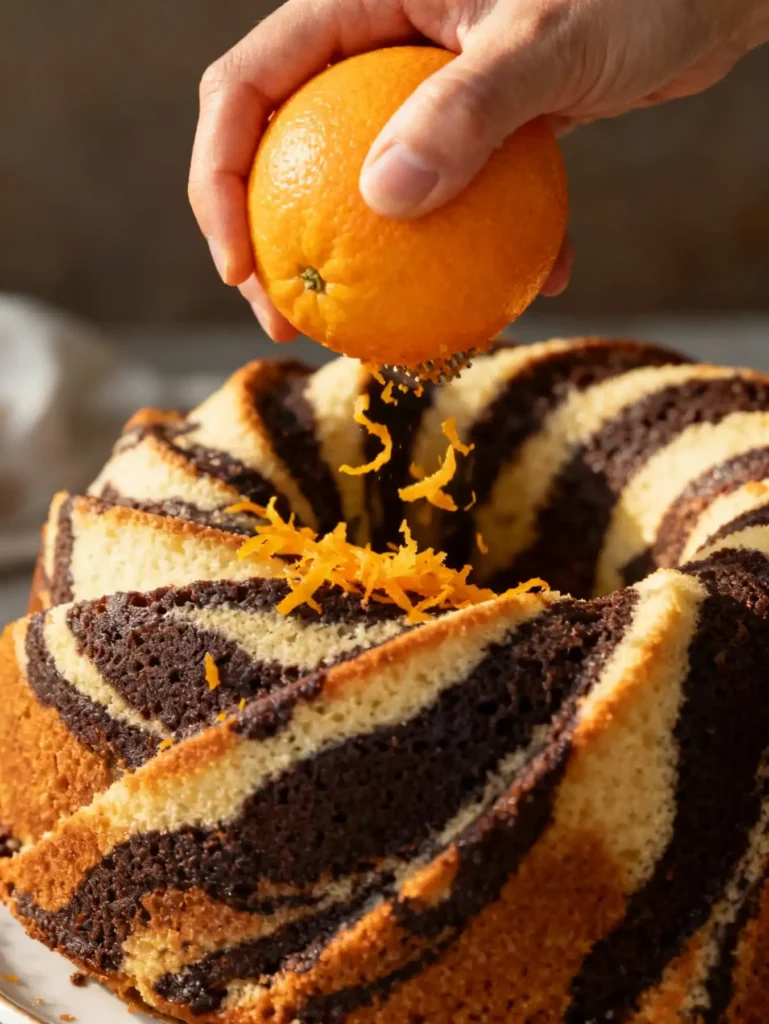
One of the best parts about working with an easy marble bundt cake recipe is how adaptable it is. Once you’ve mastered the vanilla and chocolate base, you can let your creativity shine with simple flavor enhancements. This isn’t just about changing taste—it’s about layering in personality and seasonal flair, all while keeping that perfect swirl intact.
For a bright citrus burst, try adding orange zest to the vanilla batter. It gives the cake a fresh, aromatic lift that pairs beautifully with rich cocoa. If you’re baking for a fall brunch or winter gathering, this variation feels warm and unexpected. You can even replace the vanilla extract with orange extract to deepen the flavor.
Coffee lovers? Add 1–2 teaspoons of instant espresso powder to the chocolate batter. It intensifies the cocoa without making it taste like coffee and creates a deeply aromatic, café-style marble bundt cake experience. It’s like your favorite mocha latte—baked into a slice.
Almond extract also works wonders. Just a ½ teaspoon can completely change the vibe of your easy marble bundt cake recipe, giving it a delicate, nutty sweetness that pairs beautifully with a chocolate swirl. You can even fold in a few finely chopped nuts—pecans or walnuts—for texture.
And if you’re feeling adventurous, try a chocolate raspberry swirl. Add raspberry jam to a portion of the vanilla batter and swirl it alongside the chocolate. It’s bold, it’s fruity, and it turns a simple cake into a centerpiece.
Many of these flavor ideas were inspired by rustic cakes like the Orange Date Walnut Passover Cake, which proves how even heritage-style desserts can be full of exciting combinations. The key is using high-quality extracts and not overdoing it—subtlety wins in bundt cakes.
So, if you’ve already mastered the basic easy marble bundt cake recipe, don’t stop there. Let your pantry guide you to the next variation. Whether it’s citrusy, nutty, fruity, or bold—every swirl tells a new story.
German Marble Cake vs. American Versions: Key Differences
While the easy marble bundt cake recipe is a staple across many kitchens, there’s a clear divide between German and American interpretations of the cake. Both are delicious—but their ingredients and approach vary in subtle but important ways.
The traditional German marble cake (or marmorkuchen) relies on butter for richness and uses cocoa powder to create its swirl. The batter is often firmer, with a denser crumb and a buttery finish that feels slightly old-world. You’ll often find it baked in loaf pans or simple tube pans, making it an everyday coffee cake more than a showstopper.
In contrast, the American-style marble bundt cake tends to lean on oil or buttermilk for moisture, resulting in a softer, fluffier crumb. It’s lighter in both texture and flavor, but still rich thanks to the swirl of chocolate. Our featured easy marble bundt cake recipe lands squarely in this category—using buttermilk and oil to guarantee a soft bite that stays fresh for days.
German versions also skip the glaze more often, preferring a dusting of powdered sugar. But in America, bundt cakes usually get topped with vanilla glaze, chocolate ganache, or even cream cheese icing. The visual wow factor matters just as much as taste.
And let’s talk shape. The traditional German cake often skips intricate bundt molds, while American bakers go all in with decorative pans. Just look at the swirl design impact in cakes like the Elvis Presley Cake Recipe—form matters as much as flavor in these nostalgic bakes.
Despite the differences, both styles celebrate the beauty of swirls and the contrast of flavors. Whether you prefer the denser richness of butter or the soft springiness of oil, this easy marble bundt cake recipe gives you the best of both worlds—especially if you blend elements from each tradition.
No matter your approach, the swirl is timeless. It’s a reminder that simple ingredients—done right—can create something truly beautiful.
Great! Let’s now move to Part 5 and elevate the keyword density for easy marble bundt cake recipe while keeping the tone natural, sentences varied, and the voice active.
Make Ahead, Freeze, and Store This Easy Cake
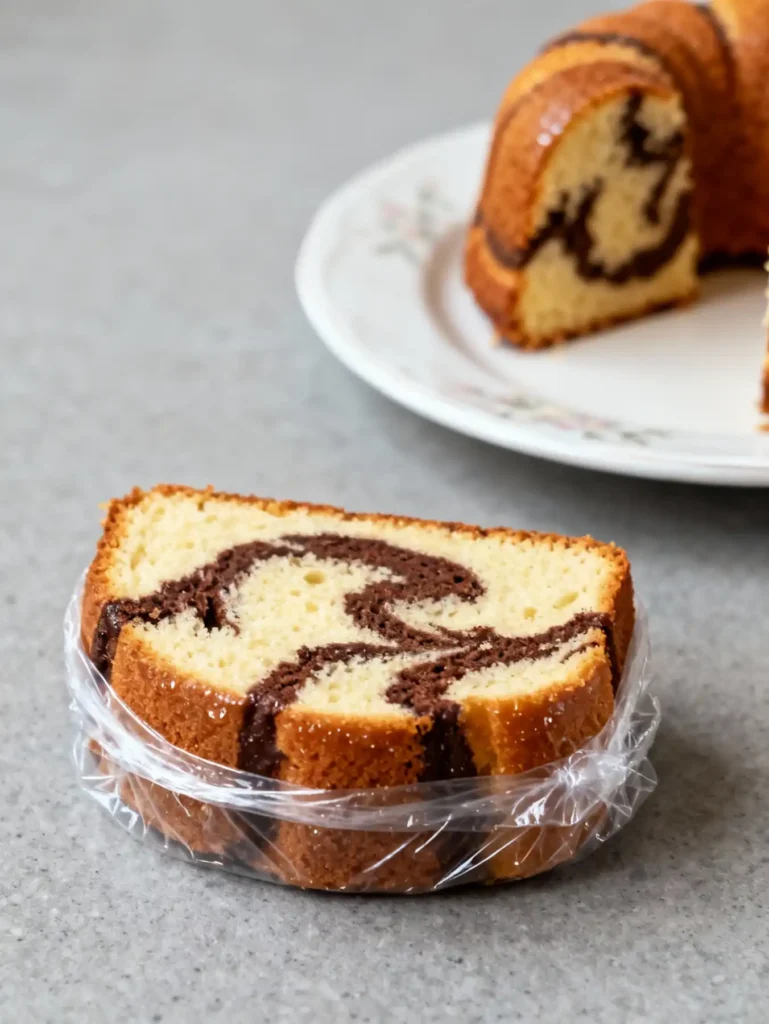
How to Store Easy Marble Bundt Cake Recipe with Buttermilk
One of the best things about this easy marble bundt cake recipe is how beautifully it stores. Whether you’re making it the night before a dinner party or baking it for your weekly treat stash, this cake holds up for days without sacrificing flavor or moisture. Thanks to the buttermilk and oil base, every slice remains rich, tender, and just as indulgent as the day it was baked.
Once your bundt cake has cooled completely, wrap it tightly in plastic wrap or aluminum foil. Then place it in an airtight cake container or zip-top bag to lock in moisture. At room temperature, your easy marble bundt cake recipe stays fresh for up to 3 days. Keep it in a cool, dry spot—never near the stove or in direct sunlight.
If you’ve glazed your cake, let the glaze set fully before wrapping it to avoid a sticky mess. Or, better yet, store the glaze separately in the fridge and drizzle it just before serving.
For longer storage, the fridge is your friend—but only if wrapped properly. Refrigeration can dry out cakes, but this one stays soft due to the buttermilk. Just ensure it’s tightly sealed to avoid air exposure. Bring it to room temperature before serving for the best texture.
Want more make-ahead inspiration? Cakes like this Sweet Potato Cobbler With Canned Yams are also great examples of how to prepare and serve desserts over several days.
This storage flexibility makes the easy marble bundt cake recipe ideal for holiday prep, potlucks, and weekday desserts. Make it once, and enjoy it all week long.
Freezing Instructions: Slices or Whole Cake?
Yes, you can absolutely freeze this easy marble bundt cake recipe—and it freezes beautifully. That’s another reason it’s one of my favorite cakes to bake when life gets busy. Whether you’re planning ahead or trying not to waste leftovers, freezing this bundt cake is simple and effective.
To freeze the whole cake, let it cool completely first. Then wrap it tightly in a double layer of plastic wrap, followed by foil. Place the wrapped cake in a freezer-safe bag or container to prevent freezer burn. Label it with the date and freeze for up to 3 months.
To thaw, transfer the cake to the refrigerator overnight, then let it sit at room temperature for 1–2 hours before serving. This method keeps the texture soft and the flavors fully intact.
Prefer to freeze individual slices? Go for it. Cut the cake into thick slices, wrap each one in plastic, then foil, and store in a zip-top freezer bag. This way, you can pull out a single serving any time the craving hits. Pop it in the microwave for 20–30 seconds for a warm, just-baked feel.
This approach is perfect for portion control or meal prepping sweet treats ahead of time. It’s also a great strategy for preserving special cakes like Cranberry Orange Bread with Glaze, which also holds up well in the freezer.
No matter how you choose to freeze it, the beauty of this easy marble bundt cake recipe is that it comes back to life with very little effort. Just thaw, glaze (if desired), and enjoy.
So the next time you bake, double the batch. Freeze one cake and serve the other. It’s the kind of make-ahead dessert that saves time without compromising flavor—and that’s the ultimate win for any baker.
Frequently Asked Questions About Easy Marble Bundt Cake Recipe
What is the best oil to use in an easy marble bundt cake recipe?
The best oil for an easy marble bundt cake recipe is a neutral oil like canola or vegetable oil. These oils don’t interfere with the flavor of the vanilla or chocolate batters and help retain moisture far better than butter. Avoid using strong-flavored oils like olive or coconut unless you’re intentionally adding those flavor notes. Neutral oil gives the cake its soft crumb and extended shelf life.
Can I use sour cream instead of buttermilk in this easy marble bundt cake recipe?
Yes, you can substitute sour cream for buttermilk in an easy marble bundt cake recipe, but the texture and flavor will slightly differ. Sour cream adds richness but less tang than buttermilk. If using sour cream, you may need to thin it with a splash of milk to match buttermilk’s consistency. That said, buttermilk remains the top choice for achieving the cake’s signature tenderness and flavor depth.
Why did my marble swirl disappear during baking?
If the swirl disappeared in your easy marble bundt cake recipe, you likely overmixed the batters or swirled too aggressively. Gentle swirling creates distinct patterns, but overdoing it blends the colors and flavors, resulting in a uniformly brown cake. Also, if your chocolate batter was too warm, it could have blended into the vanilla base. The key is restraint and even consistency between both batters.
How do you keep a marble bundt cake from sticking to the pan?
To prevent sticking in your easy marble bundt cake recipe, grease every inch of your bundt pan thoroughly. Use a baking spray with flour or brush on a homemade paste of flour and oil. Don’t forget the center tube and all ridges. Let the cake cool for 15–20 minutes in the pan before inverting it. Following these steps ensures a clean release and a beautiful swirl design.
Is it better to use cocoa powder or melted chocolate for the swirl in this recipe?
In most easy marble bundt cake recipes, cocoa powder is preferred because it blends more easily with the batter without altering consistency. Melted chocolate adds richness but can thicken the batter, leading to uneven swirls or sinking. If you do use melted chocolate, make sure it’s cooled and balanced with a bit of oil or milk to keep the texture consistent with the vanilla batter.
How long does marble bundt cake stay fresh after baking?
An easy marble bundt cake recipe stays fresh for up to 3 days at room temperature when wrapped well and stored in a cool place. If refrigerated, it can last up to 5 days, though it’s best served at room temp. The oil and buttermilk combination ensures that this cake maintains its soft texture without drying out. You can also freeze it for up to 3 months with no loss of quality.
Conclusion
If there’s one dessert that never fails to impress while staying incredibly simple to make, it’s this easy marble bundt cake recipe. From its buttery vanilla crumb to those rich, hypnotic chocolate swirls, every bite is a beautiful balance of flavor and texture. Whether you’re baking it for a holiday table, a birthday, or just a sweet weekend treat, this recipe always delivers comfort and elegance without stress.
What makes this easy marble bundt cake recipe even more special is how versatile it is. Want to change the flavor? Add orange zest, almond extract, or espresso. Want to prep ahead? Bake it, freeze it, and enjoy it when you’re ready. The combination of oil and buttermilk ensures it stays moist and delicious, even days later. It’s the kind of cake that becomes a family tradition—the one everyone requests, time and time again.
And let’s not forget: this cake looks absolutely stunning right out of the pan. No need for elaborate decorating—those natural swirls do all the work.
If you’re inspired to bake even more marble-style or swirl-based treats, check out these incredible inspirations:
- This classic German Marble Cake from AllRecipes is a timeless version using butter and cocoa.
- Prefer a denser option? This Marble Swirl Pound Cake offers that bakery-style finish with a rich crumb.
So next time you need a cake that’s both stunning and simple, turn to this easy marble bundt cake recipe. It never lets you down—and it just might become your new favorite bake, right alongside my Grandma’s Apple Crumb Bars!
Print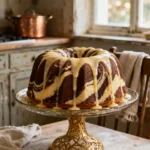
Easy Marble Bundt Cake Recipe
- Total Time: 1 hour 5 minutes
- Yield: 12 servings 1x
Description
This easy marble bundt cake recipe is a moist and stunning swirl of vanilla and chocolate flavors made with buttermilk and oil for a soft, tender crumb. A beautiful centerpiece dessert that stays delicious for days, perfect for any occasion.
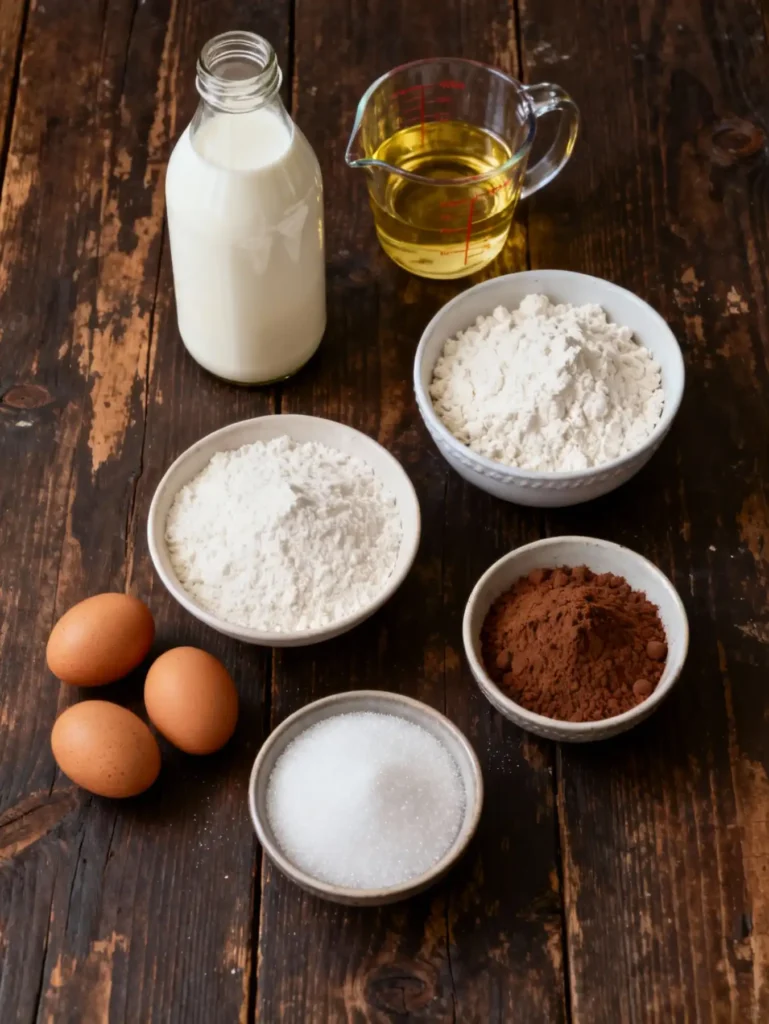
Ingredients
- 2 cups all-purpose flour
- 1 ¼ cups granulated sugar
- 1 tsp baking soda
- ½ tsp salt
- 1 cup buttermilk, room temperature
- ½ cup vegetable oil
- 2 large eggs
- 2 tsp vanilla extract
- ¼ cup unsweetened cocoa powder
- 3 tbsp hot water (for cocoa mixture)
Instructions
- Preheat your oven to 350°F (175°C). Grease a 10–12 cup bundt pan generously.
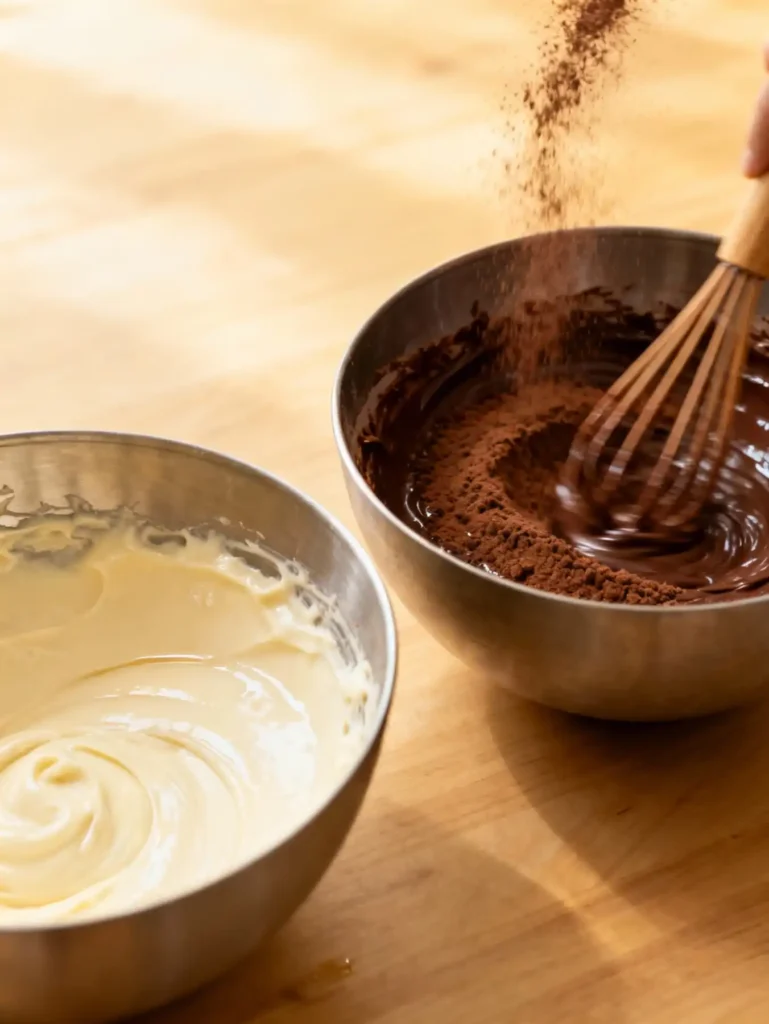
- In a large bowl, whisk together flour, sugar, baking soda, and salt.
- In a separate bowl, whisk buttermilk, oil, eggs, and vanilla until smooth.
- Pour the wet ingredients into the dry and stir just until combined.
- Transfer ⅓ of the batter into a small bowl. Add cocoa powder and hot water, mixing until smooth.
- Pour half of the vanilla batter into the pan, then spoon half the chocolate batter over it. Repeat with remaining batters.
- Use a knife or skewer to gently swirl the batters together—don’t overdo it.
- Bake for 45–55 minutes or until a toothpick comes out clean.
- Cool in the pan for 15–20 minutes, then carefully invert onto a wire rack.
- Let cool completely. Dust with powdered sugar or drizzle with glaze before serving.
Notes
For best results, use room temperature ingredients.
If using melted chocolate instead of cocoa, cool it completely before swirling.
Store covered at room temperature for up to 3 days.
Freezes well for up to 3 months.
- Prep Time: 15 minutes
- Cook Time: 50 minutes
- Category: Dessert
- Method: Baking
- Cuisine: American, German
Nutrition
- Serving Size: 1 slice
- Calories: 310 kcal
- Sugar: 22g
- Sodium: 190mg
- Fat: 14g
- Saturated Fat: 2g
- Unsaturated Fat: 10g
- Trans Fat: 0g
- Carbohydrates: 42g
- Fiber: 2g
- Protein: 4g
- Cholesterol: 40mg